10 Questions with Game Designer Mark McLaughlin
| Question from Hudson's Hideout Wargaming |
Mark McLaughlin's Response |
|
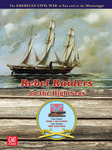
1) Of all the hoops you had to jump through to get Rebel Raiders on the High Seas to market which event would you say you were the LEAST prepared for?
|
The only hoop was time -- GMT loved the concept and design and put it up on the P500 right away but it took three years to amass enough pre-orders to justify getting a spot on the production schedule! Watching the ticker literally go up by one order every day or every other day...that was painful.
|
2) If you could do Princess Ryan's Star Marines all over again what is the one game mechanic you would change?
|
I would make it easier for players to acquire the little cards that they can use to zap one another or modify the outcome of a skirmish.
|
3) For Rebel Raiders what was the main thing that touched off your drive to get a game on that subject matter created?
|
Boats. I wanted to see boats! In 1980 when I designed Army of the Potomac/Army of the Tennessee (The Mr. Lincoln's War series) I put in ironclads, gunboats, raiders and blockade runners -- because NO other strategic ACW game had them...and in 2008 when I decided to do Rebel Raiders there were still NO boats in other civil war strategy games (sure, maybe a card or special counter here or there, but usually navies were handled by some dice on a chart on the side or other abstract mechanism).
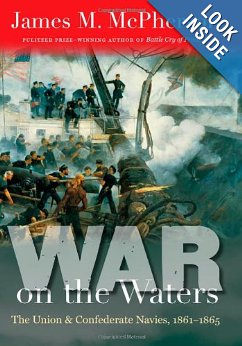
James McPherson (an award winning author and professor at Princeton whom I have twice met and conversed with and long admired,) concludes his new book War On the Waters with this telling statement: "To say that the Union navy won the Civil War would state the case much too strongly. But it is accurate to say that the war could not have been won without the contributions of the navy."
I wanted to show that in a game...
...and boats are cool...especially ships of that bizarre period of experimentation!
|
4) When you started creating and designing games did you have any designs that were flat out rejected by a company?
|
I have been exceedingly fortunate. I have never had a design out and out rejected. I designed an Axis and Allies type NATO game that 3W was going to do but my timing was awful...we were play-testing it when the Berlin Wall came down (we mutually agreed to pull it from the schedule). I had a great big Roman game that Task Force Games was going to do..but it got caught up in a change of management and in their new direction it got sent back to me. I showed it to [Don] Greenwood at Avalon Hill who told me if I had given it to him three years ago (this was the mid 90's) they would have loved it, but the market had changed and it was too much game with too many components (and he was right).
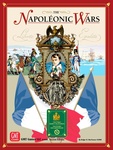
That, however, got us talking and he and Ben Knight took me to lunch to ask if I could design a We the People meets War and Peace (my 1979 AH game), oh, and make it multi-player and design it so it could be played in one sitting with rules so short you could read them during a typical visit to the john.
That became Napoleonic Wars -- which was optioned by Hasbro when they bought AH, and nearly got published by them (even had a developer assigned to me,) but again, management changes knocked it out -- but Mike Gray at Hasbro called GMT on my behalf, telling them there was this great game they would like.
|
5) How many hours a day would you say you devoted to Rebel Raiders while you worked to get it finished?
|
That is impossible to estimate. I am a free lance writer. There are times I could arrange to get my work out of the way to clear the decks for a two or three day arc to work on the game; there were other times when I could not get to it for weeks -- except to make some minor changes due to a book or other research I was doing or when some idea would pop into my head. Game design is not a job; it is a hobby that happens to make some money (and not a lot). I love to work on my designs, but can only do so when time permits.
|
|
6) Of all the changes and the corrections that you have gone through on Rebel Raiders what was the one mechanic that you removed that did not make it into the game?
|
A lot of the optional rules began as rules in the body of the game -- Fred Schachter (my developer/editor) and I agreed early on to move a lot of them out of the main game and into the playbook --- to create a multi-tiered game, much like the old AH did with basic, advanced and tournament rules.
|
|
7) Who did you get in touch with for the artwork on the counters and the box or was that assigned by GMT?
|
GMT is great about this. Mark Simonitch has done the maps for all of my GMT games. He has done most of the card and counter work and rules layout, or in this case oversaw it with Charlie Kibler, who did a great job (and who loves the period perhaps even more than I). Rodger MacGowan has been doing box covers for my games for 30 years -- and he and Mark are among the key players in the company as well, as they deserve to be -- they do such fabulous work.
|
8) What is next for you on the horizon as far as game design goes?
|
For the last eight months I have been working on and play-testing what I hope will be a series of quick play strategic games I am calling the Card Conquest series...imagine a half-size game map, a handful of counters, and combats and political contests resolved by playing the card game War! But to which you add some dice and events. The one Fred is working on now with me is Hitler's Reich, a WW2 ETO strategy game that takes from 20 minutes to two hours to play. We have six playtest groups around the country, and I am talking it up with GMT at WBC in August. My work on that is 99 percent done (Fred has the lead on it now) and I am already at work on the next game in the series, Hannibal.
|
9) From start to finish was the total amount of time you spent getting Rebel Raiders to the public in its final form?
|
That is impossible to estimate. I started the design in 2008. The game shipped in 2013. Most of my time went into the front end of that...about a year's work to get a good, solid and playable design. Fred got involved in it during that first year as well, which was a big help (I always work with editors, not just in my games but in my writing). We were pretty much satisfied with it by the time it went up on the P500 -- but of course used the intervening years to keep playing, testing, tweaking here and there...and to keep taking things out of the main game and putting them into the playbook.

|
|
10) If you could meet one great military commander from history who would it be?
|
One? I only get to meet one? I guess since I have done so much on Napoleon, (War and Peace, Napoleonic Wars--two editions...Kutuzov, Wellington,) it should be him. Although part of me would like to warn him not to go into Spain or Russia, well, just think of how many great books, novels, movies, television series (Sharpe, Hornblower, Patrick O'Brien, Brigadier Gerard) not to mention miniatures and board games would never have come about if he took that advice!
|
BACK TO TOP
Kadesh Revisited
By Mark McLaughlin
August 26 & Sept 2, 2013
Kadesh, the first and most famous of the chariot battles. We'd done it before, but this time we did it with Field of Glory V2 -- and a few extras.
As per the historical event, the Egyptian Army was spread out...one division at the north end of a 10-foot table in camp with Pharaoh Ramses. One division in the middle of the table marching toward him. A third division coming up from the south, and a fourth coming in from the west. A chariot force also coming in from the northwest.
The Hittites, though numerically and in other ways inferior, (much of their infantry undrilled, the rest defensive spear) set an ambush. Giovanna, our 11-year old "Queen" of the Hittites sprung the trap. She smashed Ed's division (the one in the middle) as expected, but then kept on going! Her four light chariot units roared into Robin's division coming in from the west and smashed that one too!
With only four light chariots, however, two of them neither superior nor drilled, Giovanna eventually ran out of steam -- the two worse chariot units dissolved -- and another was stuck in against superior numbers, which is where we began the second night. (The fourth chariot, however, had broken all the way through to the far edge and was turning around, threatening the rear of the Egyptian chariots mixing it up).
On night two one of Giovanna's chariot units dissolved and the other got involved in a running bow fight and chase with a bigger Egyptian unit of Tim's...meanwhile, Tim's southern division came up...and ran smack dab into a second ambush...a bow and a spear unit hidden in rough ground...but that ambush proved to be merely a speed bump, as Tim sent both Hittite units routing...
In the North, Ed completed the move Phil had begun on the first night to deploy that division and bring in the NW chariots...he pressed Giovanna's one light and one heavy, as she tried to buy time for Bob to come up with the Hittite reserve -- 3 heavy chariots (which represented the second and heavier wave that did fight in the real battle) and the Hittite infantry (which watched the real battle, and here spent two nights mostly marching.)
The Hittites were being hemmed...but Bob got lucky, getting one heavy chariot unit into combat with a bigger Egyptian light chariot unit and making it rout. Ed threw a chariot unit against one of Giovanna's and was starting to win when Bob brought up some archers who got lucky against the unengaged overlapping bases, caused a morale check which Ed failed, then Giovanna held and the archers, making a morale check, charged -- and that was enough to break that Egyptian push.
Bob's other two heavy chariots got into an archery duel with Ed's Nubian archers...and got the better of them, then charged...
At this point, however, Ed, who believed that Pharoah, especially Ramses, would never just sit and watch his chariots fight, put Ramses into the battle...in a chariot battle where he had an advantage in numbers if not pips on the dice...and he lost, and Giovanna of course rolled--and killed Ramses.
That, by the way, was a condition for automatic defeat in the scenario (as was looting the Egyptian camp) but by then the Egyptian army in the north was falling apart, and two out of four infantry who saw Pharoah die did not like it and went down in cohesion just as the Hittite Heavies were charging.
History rewritten. "Queen" Giovanni of the Hittites kills Pharoah Ramses. (Heh, if your Pharoah has to die, at least dying at the hands of an 11 year-old girl is't all that bad of a way to go...)
BACK TO TOP
The British Army Takes The Field
By Mark McLaughlin
March 3, 2013
Phil's British miniatures army took the field for our first ever game using the rule set NAPOLEON AT WAR . In this rule set the British Army has many, many fine qualities and damn few weaknesses, if any. British infantry are very strong on defense, and rightly so. Their cavalry is surprisingly good - figure for figure, better than the French. The artillery is good, but has slightly smaller batteries (3 guns vice the normal 4) making it less effective and more brittle. Overall, as the French were to learn, the British Army is a formidable foe.
Phil's British army (under he, Charlie and Robert) was a grand and powerful force, with 16 battalions (including two each of guards, highlanders and lights), 4 cavalry regiments (all rated "brave") and two batteries, one of them horse. In game terms this force cost just less than 3,000 points, and except for a brigade of Portuguese was all-British. The French force (Bob and I and a new guy, Ed the Wrestling Coach), just over 3,100 points had 12 battalions (6 of them, however, legere), 8 regiments (4 light, 4 dragoon) and three batteries (one heavy, one medium, one horse).
All British cavalry and the French dragoons were off table as reserve. The French, by definition (and, of course, by inclination, as I was in overall command), were on the attack.
The attack was led by French light cavalry - or rather, more properly, NOT led by them. No French light cavalry unit EVER charged home at ANY point in the game, all day.
Ed and I opened by charging into Phil's light infantry out in the open in line - and in both charges Phil killed a base, making the test to close unfavorable (roll two dice, BOTH have to be 4 or better). Neither went in. (Bob had the same situation later in the day when the Hussars I sent him suffered the same fate, even charging a weakened British unit). The British light horse arrived right away, charged one French light (which attempted to evade, but was instead caught and destroyed - as was the infantry battalion behind it when the victorious British horse broke through and rode it down.)
Our right flank in tatters, Ed put two of his three remaining battalions into square, to buy some time, while throwing a light battalion into the orchard in the center, with me.
The middle of the table was dominated by a La Haye Sainte farmhouse complex which neither side wanted to enter and an orchard. That grand new player named Ed and I each sent a legere battalion into it - and held it for the entire game, as the British and Portuguese infantry under Phil and Robert could not budge us from the bushes. An attempt to push the Guards between the farmhouse and the orchard was defeated by the French horse batty and a legere, which destroyed one of the British Guard battalions.
On the left, the two bigger French batteries knocked about some Portuguese, and supported an advance by a pair of French on that side of the farmhouse. Bob went up the center with the batteries to knock Charles' advance force, led by the British horse battery, off the center hill. Bob got his legere into the woods on the far left, and efforts by Charlie's highlanders and line to push him out met with the exact same disastrous result as Phil and Robert's vs. the orchard.
The French dragoons now appeared in the center, and started riding en masse up the middle. The British pulled back all across the center and opposite Bob. Ed managed to extricate himself from what could have been disaster on the right, and although Phil took the objective on that flank, Ed, with the remnants of the French light horse, was able to contest it.
Phil moved the British dragoons and one of his two light-horse to the center to initiate a battle with the French dragoons - who fared only slightly better than their hussar/chasseur comrades. The dragoons did repulse one British charge, but one regiment was wiped out in a subsequent charge, and the regiment behind it was caught flat-footed in the breakthrough, (having incautiously been a skootch too far forward, and thus just being in jeopardy of a British breakthrough on the first line). It lived, but barely.
Despite the failures of French horse all day, the French actually managed to pull out a win. Bob broke the Highland Brigade and destroyed their horse battery, giving the French two points. The British lost several other battalions (including a Guard, a line and a Portuguese). No French brigades or batteries were lost or exhausted. One infantry battalion and one light cavalry regiment were lost, along with a few bases and many skirmishers, and the French were on the advance, moving forward on their left, holding the forward center and contesting one British objective held by Charlie, just as Ed was contesting one French objective held by Phil.
A marginal victory for the French, but a victory nonetheless...
BACK TO TOP
John Covello's Last Charge
By Mark McLaughlin
September 8, 2012
Phil brought the forces for a pair of 2500 point per side Napoleonic battles at the Connecticut Game Club on September 8.
In the first game, Charlie took command of the Austrians, along with Mad Mike, Dan and Kevin. As per the scenario from the book, half of their army was deployed at start, the other half would come on by die rolls (even those purchased at normal price). The French (Phil, John Manning, John Pasaglia, Tom Cusa) would also start with half their forces on the board, with the other half arriving on the flank of the Austrians at the end of turn one.
Tom and John Manning took the pinning attack. Tom cleared a woods with his re while Manning advanced cautiously on a massive Austrian infantry force. Phil and John Passaglia roared on the board between a woods and a lake behind the Austrian left -- but got nowhere. The Austrian reserve cavalry showed up on turn two! That stopped the flank attack cold, forcing Passaglia to deploy his infantry and guns while Phil scrambled to reorder his horse to face their dragoons.
The back and forth cavalry battle on that flank was inconclusive, but then Phil moved half of his cavalry to the French right center — and dove in, breaking some Austrians and forcing others into square. Unfortunately he had not coordinated with Manning, who had fallen back just before the cavalry rode to glory. Unsupported, the French cavalry had to fall back.
Cusa's attack also stalled, as more Austrian reserves showed up, blocking his advance. We called the game at the end of turn 5, as the French had no hope of taking objectives or breaking the Austrians, one of which they had to do or else the Austrians won.
Game two saw John Covello arrive for his last game for two years (he is off to Thailand for work). He and I each took a French brigade, as did Mad Mike. Charlie took overall command and had the cavalry reserve — two big, fine tough brigades...both of which apparently got lost on the way to the battlefield and showed up late....
Phil and Lynn took the Austrians opposite Mad Mike, and as they had cavalry on the table at start, began to work combined arms on him — and then more cavalry showed up for the Austrians, effectively dooming Mike to a slow, steady and certain death unless our cavalry showed up ...which it did not until too late....
Meanwhile, Covello and I, seeing Mike being crushed, faced Dan and Fritz, each with Austrian brigades larger than ours. John and I looked at each other, and decided what the hell, if we are going to lose anyway we may as well go down like men — so we fixed bayonets and charged.
It was a tough fight, but between us we broke Dan's brigade and kept Fritz back. Even when more Austrian dragoons showed up, we kept advancing — and actually repelled cavalry with volley fire!
Unfortunately, our light cavalry got on the board just in time to be defeated by the Austrian Hussars, and only one of the battle cavalry regiments even got to charge — and it, too, was repulsed by defensive fire.
Despite our heavy losses, the battle was not a rout — neither army was broken, and the French only lost 2:1 -- thanks to the last charge of John Covello....
BACK TO TOP
Naval Engagement Off Santa Cruz
December 11, 2010
John Covello organized a scenario for the monthly CT game club meeting based on the battle of Santa Cruz in November 1942. It was almost entirely and operational game, with War Sea models and rules for tactical engagements. John left it to me to run the searches for both sides while he did the overall game mastering.
Both sides had the historical forces, yet each also had a pool of points they could spend from a menu to bulk up. The Americans bought a battleship, a jeep carrier, a trio of Fletcher class and some more PT boats. Japanese went for more destroyers, submarines and air
Japanese players (Brandon and Keith) had to land a division on the western end of Guadalcanal. That meant getting a fleet of 11 transports to the island; whether they won or not would depend on if they got there, and with how much.
They had four task forces. Two carrier groups (a total of four carriers: two big fleet carriers Shokaku and Zuikaku, and the light carriers Junyo and Zuiho) , a surface covering force and the transports. They also had a good number of submarines plus Emilys for scouting and Bettys they could use as strike or scout (good strike, esp. vs land, mediocre scout at best). They also had fighters back in Rabaul they could use.
The Americans (Warren, Mike and John) were told they had to guard Guadalcanal. They knew the Japanese were coming, but not why a quick Tokyo express landing? A major invasion? A mission to bombard Henderson? Or just a 'go sink ships?'
Americans had the Marine air wing at Henderson, two carrier groups (Hornet and Enterprise), Admiral Lee with two old battleships, and Cunningham's cruisers. Americans had some PBYs and had many B17s and B25s off at Noumea. Again, they could use these as a strike force (B25s being particularly good against transports) or as scouts again, poor scouts, like Bettys, but still scouts. Americans also had subs and PT boats.
The game began at dawn, 0500 hours. The Japanese had until 0500 the next day to make the landing. As the transport fleet was 21 hexes away, moving at one hex a turn, that gave them at most three turns of leeway for maneuvering.
The Japanese sent their carriers straight down the slot. If they were meant to be found as bait, that worked, and worked in spades. Americans found them early - and before noon Hornet launched its planes they came in and despite the double CAP the Japanese put up, Hornet's Dive bombers managed to get through to bomb a fleet carrier but did no damage. Enterprise followed a turn later, managed a hit on that carrier - but not enough to slow it down or affect its air ops. Next turn, Marines from Henderson came in - and were bounced.
Having fended off three penny-packet air raids in as many turns, the Japanese sighed with relief - their own scouts had found the American battleline just off the western tip of Guadalcanal and their sub scouts found Cunningham off Henderson but still no sign of US carriers --- the Japanese Emilys and subs were able to report the track the carrier planes took, however, and from that the Japanese plotted where they thought the carriers would be - and sent an Emily out to find them.
But still, they did not launch.
In the meantime, the Americans found the Japanese covering force - unfortunately, all they could find out from scouting die rolls was that it was many surface ships - no carriers, but no other details. As it was moving two hexes a turn, they knew it was not transports.so could this be the main attack? A Tokyo express run with destroyers packed with troops? A Henderson bombardment?
The Americans focused their scouts all around these two fleets, shadowing each with a PBY and surrounding those hexes with B-25s and B-17s..
They were able to follow the Japanese surface ships, and decided that their next strike would be that fleet, as the attacks on the carriers had not played out well. It was at this moment, however, that the Japanese surface fleet turned BACK to cover the slow moving transports.and this turn led the Americans right to the transports.
The Americans had not found the transports, and were not really even looking for them. Had the Japanese surface ships kept moving toward the canal, the Americans would have struck them - and just them - but as luck would have it the turn the Americans launched was the turn the Japanese surface and transport forces joined up.
and so when the Americans burst through the clouds, not only did they see battlecruisers Kongo and Haruna --- but 11 slow fat transports..
In came planes from Hornet and Enterprise together. Without Japanese fighters to worry about, even the fighters came in to strafe.
Five of six squadrons found their marks. In a flash, three transports were crippled - one so badly that it would sink on its own the next turn (the Americans got DOUBLE its vital armor) and two others hit.
The Japanese, staggering, decided to cut loose the cripples (which move every other turn) and press forward with the remaining 8 transports, two of them hurt. On the next turn, the Marine air from Henderson found the cripples.and sank them.
The Japanese finally found the US carriers.and sent everything they had against them. Like true Samurai they pressed the attack but unlucky die rolls on their part cost them two strike squadrons.only one squadron made it through the heavy US flak screen (heh, each carrier had a CLAA as close escort, plus other heavy and light cruisers and Fletchers all around).Enterprise took a hit, but, like the Japanese fleet carrier, the damage was not enough to slow it or hurt it
The Japanese also saw the American battleline was coming straight for the transports.so the Japanese moved their carriers south and their combined battle-transport fleet north to join up, hoping this would allow the carriers to provide CAP for the surface fleet and bring everything together in one massive force.
And as they did so, the American aircraft came down out of the clouds.and the two damaged previously damaged transports were sunk, another was crippled and two others damaged..
Dusk was approaching, but there were still two hours of daylight left and the American battleline was one or at the most two turns away from hitting the slow moving transports (one turn if the Japanese stayed or move forward, two if they tried to fall back).which would have brought about a surface battle in daylight and that would have been disastrous for the Japanese, as they had only two battlecruisers against three American battleships (Washington, South Dakota, Tennessee).
The Japanese, not wishing to fight such an action in daylight, and with a third of their strike aircraft squadrons lost, were not very hopeful about evening the odds should they even get that last strike off.
With five of 11 transports already lost, a sixth crippled and two others hit and vulnerable.
Admiral Nagumo ordered the fleet to turn around.
Total losses:
Japanese: 1 fleet carrier slightly damaged, 1 sub sunk, 2 attack squadrons shot down, 5 transports sunk, one crippled, two damaged
American: 1 fleet carrier slightly damaged
BACK TO TOP
Sea Lion
Hypothetical German Invasion of England
Decmber 8, 2007, CGC
Sea Lion, one of the great "what ifs" of WW2. The German invasion of England. We tried it with modified War At Sea Rules.
We played lengthwise on the 5 x 8 sheet, with the large 5" squares. The German convoy came in from the lower left corner - James with the three Nordmarks (armed merchant cruisers to simulate the invasion fleet), escorted by 13 E-boats and 7 Z-class destroyers. Theo came down from the top left with Bismarck, Tirpitz (heh, why not, it is hypothetical), Scharnhorst, Gneisenau, Scheer, Deutschland, five heavy cruisers and six destroyers. Off board, revving up their engines, a massive Luftwaffe air fleet -- 22 squadrons, including Ju88, He-111, Condors, Stukas and some ME-109s. John Demeter had command of the Luftwaffe...and, off board, ready to sneak in at James' command -- four Uboats.
At the far end of the long board, on the lower right, John Passaglia had a light force -- 8 Javelins, 7 light cruisers -- but he also had the RAF -- 10 squadrons of Hurricanes. Leading the way for the Home Fleet at the top right was Jim, with 8 more Javelins, 5 light cruisers, Exeter and York. Behind him, however, was Tom with the big guns, literally: King George V, Prince of Wales, Hood, Nelson, Rodney and 5 big gun cruisers.
There were two ports on the English end of the board. The Germans had to get their transports INTO either of those ports. Three transports -- the chances of the landing's success based on how many and in what he condition the transports made it into the port (i.e. All three, undamaged is a guarantee -- after that, a percentage)
The game would end when the German transports either got into the port or were sunk.
I thought it would be a quick game. It went 22 turns and took more than five hours --- and not because of the mechanics of the game (we have done bigger, much bigger) but because the Germans, under James' overall command, played a very crafty, very smart and very good game.
Point wise, the forces were almost identical (744 British, 703 German). In big gun power, the Germans were not that badly outclassed, and in the destroyers both sides were nearly equal. The British had an overwhelming superiority in light and heavy cruisers, but the Germans had all those E-boats and U-boats -- which is a LOT of torpedoes, and in the air, the British were heavily outnumbered (22 squadrons to 10, 170 points to 50)
Air power, of course, is not a constant. Planes that took off from France on turn 1, flew on turn 2 and were available to strike on turn three. Then it took a turn to fly back, another to rearm, another to launch, then back etc. In short, the Germans got in strikes on turns 3, 8, 13, 18 and would have had a fifth had the game gone into turn 23 (it ended on turn 22, with the Luftwaffe in sight.)
At first, both sides moved their forces to cover the entire width of the board, two ships per box, with ships behind. It looked like an 18th century battle, linear tactics - but this was long before the forces were anywhere near gun range. That changed very quickly.
First, the Luftwaffe rained down. John P's Hurricanes fought like "the few" splashing three squadrons and driving off most of the rest. The Luftwaffe did slight damage to a few of John P's cruisers.
James then gave the order for the entire German fleet to turn to starboard, thus putting it into a massive line of battle...and for the destroyers to make smoke.
but the Germans did not advance!
On the contrary, they limited themselves to their quarter of the board, maneuvering behind their smoke.
James had figured out that there was no need...or sense...to dash for the ports. On the contrary, although on the attack, he could actually afford to wait and draw the British towards him -- the longer the game went on, the more strikes the Luftwaffe would be able to fly. This meant that the British, although ostensibly on the defensive, had to come to him. James also tried to set some traps to bait the British into breaking up their fleet and making mistakes.
Jim came on pretty strongly, with Tom's big guns behind him along the top edge. John P moved cautiously forward along the southern edge. James and John "Luftwaffe" Demeter decided to make John P. their main target. They hit him again with everything they had, targeting his destroyers in particular, after which they brought in the U-boats. John P fought his little squadron in the best traditions of the Royal Navy - but he was, as the saying goes, overbourne by numbers.
With John P's force out of action, James shifted the German column to snake along the lower edge -- the progress marked by the oil slicks of John P's plucky but lost fleet -- James and Theo maneuvered masterfully. Using smoke to amazing advantage. Jim tried to break through the smoke to bring the battle to the Germans -- only to be smothered in 11" and 15" shells. He broke off and decided to swing wide, to come in behind the Germans.
Although a stern chase is a tough mission, and it did take much of Jim's force out of action for a long time, it did cut off a whole section of the board for the Germans. He took on the role of herding the Nazis -- although the Nazis were going where they wanted to go anyway, but this curtailed their maneuver room. So, Jim herded them ...into Tom.
Nelson, Rodney, King George V, Hood, Prince of Wales and a quintet of big gun cruisers can put out a massive amount of firepower. Unfortunately, they are not well equipped to deal with a swarm -- a literal swarm -- of E-boats (13 squadrons!!!!) not to mention a Wolfpack.
With John P's destroyers at the bottom of the channel and Jim's back chasing the Germans from the rear, Tom had to fight not only a classic big gun duel against the German battle line but do so while trying to deal with an overwhelming torpedo threat...and the Luftwaffe, which now picked on him as well...but for that, at least, he had John P's hurricanes for help.
Tom fought hard and brilliantly, but took a lot of hard knocks. First, the Prince of Wales went down. Then Rodney was crippled. The Luftwaffe sank Hood. Nelson was battered and eventually crippled, within beaching distance of the shore." All five big gun cruisers went down -- torpedoes (from Heinkels, E-boats and U-boats) finishing off what the German battle fleet had started.
But Tom fought on.
Rodney broke through the smoke, and with a brace of 8" cruisers and the help of Jim's destroyers took down Scheer and Deutschland--proof that Pocket Battleships can dish it out but they can't take it.
Tom crippled Tirpitz and sent both German battlecruisers to the bottom. As the German fleet got smaller and smaller it clung tighter and tighter to itself, still heading along the bottom of the map and then, just as it was about to hit the shore, it turned up, heading for the ports.with all three transports in pristine condition.
For 19 turns the Germans protected their fast transports. And they did it brilliantly, and got them to the British edge of the map.but as they turned toward the ports, Jim and Tom closed in. Tom put the cork in the bottle with the battered but still battling Nelson, backed by KG V. Jim came up from the rear with his Javelins. Turn 20 was a tough turn for the British, but they came on turn 21 Jim got into the German flotilla, firing his guns at point blank range, inside the smoke, to damage the rearmost of the three transports.but the other two kept moving ahead
Then, on turn 22, with the German transports within ONE MOVE of the port -- the Royal Navy showed the worth of the White Ensign...Jim finished off the damaged transport with one destroyer and sent the other two ahead, into the transports -- just as the crippled Nelson placed itself squarely in the path of the German fleet.and together they sank the transports -- one, two, three.
As turn 22 ended, the German surface fleet was reduced to Bismarck (undamaged) and a single destroyer. Three U-boats, one of them damaged, and a single E-boat squadron were still around, the Luftwaffe was on its way, ready to hit on the next turn.
But there was no next turn, and no need for it, for there were no more invasion barges to protect
Rule Brittania...
Germans
Invasion Fleet
BB Bismarck
BB Tirpitz
BC Scharnhorst
BC Gneisenau (Scharnhorst class)
PB Scheer (Graf Spee class)
PB Deutschland (Graf Spee class)
4 CA (Konigsberg, Leipzig, Nurnberg, Koln) (use Koln class)
13 DD (Z class)
13 E-boats (used Italians)
3 Transports (Nordmark class)
"Cover" Force:
Wolfpack
4 SS (U-510 type)
Luftwaffe:
- 3 ME109
- 8 Stuka
- 6 Condor
- 3 He 111 J torpedo bomber
- 3 JU 88 level bombers
total points: 703 (of which 170 is air)
Royal Navy
Home Fleet
BB KG V
BB Prince of Wales
BB Nelson
BB Rodney
BC Hood
CA Exeter
CA York
-5 County Class CA (Canberra types: Kent, Suffolk, Cornwall, Cumberland, Berwick)
-5 Ajax Class CL (Ajax, Leander, Achilles, Neptune, Orion)
-7 CL (Sydney types: almost identical to the above)
-16 "J" Class Destroyers
RAF
-10 Hurricanes
total points:
744 (of which 50 is airpower)
BACK TO TOP
Wargaming My Father
-Or my weekend as a Marauder.
by Mark G. McLaughlin
My father was a Marauder. More than that, he was the sniper for the I&R platoon of the whole brigade of Merril's Marauders. At Historicon this year, I got to be my Dad -- at least in miniature, and on the gaming table, and not just once, or twice but three times.
The first game was run by Frank Luberti, of our Connecticut Game Club. A marvelous and true jungle complete with hundreds of trees -- from which John Spiess clipped off several hundred plastic coconuts, one at a time, with nail clippers, while the game was in progress.
Frank ran a night recon scenario for the I&R platoon. About a dozen of us American players, each controlling a couple of 25mm soldiers, bungled about in the jungle, with Frank rolling dice to tell us how far we could see, and what direction we would stumble off into. A few of us stuck to the trails, against our better judgement, but it was either that or wander around lost -- which if you think about it is about what would happen in the jungle, at night, in Burma, in a war.
 Some of our guys ran into jap HMG nests, with predictable results. Several firefights broke out on each flank. The first was a small one, from which our one survivor of the initial ambush kept up a personal battle for about three hours before finally being killed by a jap with an LMG. The other firefight was sparked by a kid on our side who rather blithely walked into an open field at the end of the path -- we tried to stop him, but he went on in anyway -- he did kill some japs, but they got him...and the next guy, and the next guy after that.
I finally managed to convince another two guys to hold back, and as dawn began to break we were making our way across the thick jungle in the center, scouting the enemy but trying hard not to get shot by the second, then third and finally fourth HMG nest we spotted...each of which by then was packed with japs...as the dozen or so jap players spent most of the game forming up clusters of men for a banzai charge...
Realizing that the number of japs alive we could see outnumbered what we started with .. and that 2/3s of us were dead, we decided we had done our job of recon....and would go back and tell the general that the japs were dug in, in force, up ahead.
It was not a traditional wargamer's victory, but after three hours in the jungle under fire, getting out alive felt like winning...and, for me, keeping my dad alive was a big bonus.
The second Marauder game was a Flames of War fight of the battle of Myitkyina. (All of you know what a big Flames of War fan i am!) Unfortunately, it was the Chinese attack on the city, not the action at the airstrip (where my dad was fighting at that moment), but, it was a battle where my dad fought. I got a battalion of american trained chinese and bulled my way into the city, taking the rail station and splitting the jap defense in two. My comrades with the battalions on the right and left did not do as well, but together we still managed a victory.
 Round Three was Walabum. This was my dad's big fight. The I&R platoon was isolated across the river as night fell. All night and into the morning the japs hurled hundreds of men at his platoon. I got to lead that platoon, holding on while the rest of the marauders tried to come to my relief.
The rules were Poor Bloody Infantry. A very, very, very good set of rules for very, very, very small actions. My platoon consisted of nine bases of troops, plus three characters - a medic, a lieutenant and a nisei interpreter. That was plenty to command in this set of rules thank you! Simple yet very detailed. By far and away the best game of the con for me -- but i would not want to play Poor Bloody Infantry at home. You really need a moderator, and each guy really can command only a platoon or maybe two at best....we had four guys in the US side, vs 6 jap players.
Again, it was a victory of sorts. The Marauders did not take Walabum or even interdict it with fire -- but i did hold my bridgehead all night long and into the day, killed a lot of japs - broke two platoons and savaged a third that came after me, and stood my ground until the rest of the US force decided it was time to fall back, and i got most of the platoon -- including my dad - back across the river, alive.
The three games were each good in different ways, and each gave me a little taste of my father's war. No game can begin to mirror the hell of war, let alone the hell in burma that my dad and his fellow marauders had to face every day for nearly six months, but, still, it was a good experience, a fun experience and a learning experience.
More important, for me, however, is that the three games allowed me to do something only a few wargamers ever get to do - be my dad on a game table. Thanks to Frank and the other GMs for helping me honor my father, a Marauder.
In memory of TSGT James Henry McLaughlin, Jr., 1925-1994
Check out the Merrill's Marauders web site:
http://www.marauder.org/marauder.htm
BACK TO TOP
Operation Pedestal
The Great Malta Convoy, August 1942
See pix from this miniatures event at http://homepages.uconn.edu/~jas01033/was-07-14-07-ctgc/
Using War at Sea modified house rules, seven players at the Connecticut Game Club fought out Operation Pedestal: the last, largest and most desperate of the
dozen big convoys to Malta. Historically, the situation was so desperate, that the governor general of the island warned Churchill that without a major and immediate resupply, he would be forced to surrender. The 250,000 civilians and 25,000 military personnel were on greatly reduced rations, AA ammo was mostly spent, and he had only enough fuel for a few air operations…in short, he gave Churchill an ultimatum.
Our Allied players, John as Admiral Syfret, “Mad Mike” the destroyer leader, Calm Mike the AA gunner and grimly serious Warren, had to run their convoy the
length of a 5 x 8 foot map. – 24 columns of squares….12 turns of daylight, 12 turns of night, then daylight again…with merchantmen lumbering along at ONE square a turn.
Their mission: get as many points worth of cargo off the map and thus into Malta as was done historically (10 points – with undamaged merchants worth 3, the great tanker Ohio 4, and less for damaged or crippled). OR get at LEAST 5 points of cargo off – to allow Malta to keep fighting until the NEXT convoy could be put together….. Anything less, and Malta would surrender. Every ship that was there, and I mean every ship and boat, except for maybe a tug or two, was there. And
so were the squadrons….
 The Allies put together 14 big merchantmen – including the great oil tanker Ohio, which they packed with guns and gunners. Two protect this they assembled the largest fleet the Royal Navy had yet put into the Med: Three fleet carriers and an escort carrier, two battleships, seven cruisers and 25 destroyers – plus a trio of minesweepers and ASW trawlers.
A convoy of this size was impossible to hide. German and Italian naval and air high command mobilized every asset they had. Over 400 planes from Sicilian and Sardinian airfields. Five U-boats, 16 Italian subs, 11 MBTs, 5 large torpedo boats, even a pair of new German E-boats….and a surface fleet. By draining the fuel from their battleships the Italians managed to put 3 heavy and 3 light cruisers and 11 destroyers to sea.
The Axis plan was to set up a gauntlet of layers.
John Passiglia, whose father in law was with the Italian air force, took command of the Italian surface fleet and the Sicilian air armada (9 squadrons – including Savoia and He111J torpedo bombers, JU88 and Stuka dive bombers, ME109 and Macchi fighters). James took the Sardinian airfield (6 squadrons) and the
light attack ships and boats. Gregg took the hard job – sub commander. He had to deploy his subs in three fleets at three separate parts o the map – in
secret, written down by grids. When the allies came within two squares, he had to place markers: 12 grey plastic subs – half marked on the back to show real,
half blank for dummies.
The Allies had to search for the subs, and if found could attack them … but would not know if what they sunk was real or dummy….unless Gregg came to periscope depth to shoot, then we put out real subs.
The convoy came on slow and steady and tight…and nothing happened for three turns…On turn four the air strike from Sardinia hit. (it took a turn to launch,
two turns to fly, then on turn four the Sardinian air fleet could hit, and it did). The raid managed to sink a merchantman and damage another, for the loss of
one squadron. Two turns later, the larger Sicilian air fleet came in – it got two more merchantmen. Allies had good air cover – a Martlet (ie British flown Wildcat) and 4 sea hurricanes, and these bounced a goodly number of the axis air. We allow AA to fire adjacent (4s miss) provided that no enemy air were in
their box -- this means yhou can’t mob a square with more planes than can be shot at, unless you also suppress the adjacent boxes.)
Things got quiet for a while, then contact was made with the first line of subs on column 17 – 7 squares in from the edge of the map. This is where things got tough for Gregg, and where the allies, gaining initiative time and time and time again in daylight (they did have a flagship, the axis none, which helped) were able to jump the subs. Mad Mike would always rush two DD or DE into a square with a sub, and when he did not have the initiative, which happened rarely, he set up traps to surround the sub – so no matter where it went, except back, it would be attacked. He also used his PBY and Fulmar (ie Swordfish) air to search and strike. The Furious (we used enterprise) launched the planes she was ferrying for Malta – these would give air cover the NEXT day….although without aircraft of her own, Furious stayed with the fleet – to give the allies another platform to land and strike air.
Mad Mike killed a lot of subs – real and dummy. So much so that Gregg gave up trying to fight or push into the convoy, and instead elected, very sagely, to
fall back to the east….to wait for night and the Italian fleet.
Turn 12, the last turn of daylight, saw the biggest air attack of the game. James and John P. timed their strikes to hit simultaneously (each airfield could only fly twice in the day, with times for flight to and from and rearming set). And hit they did. Massively. And they were met, massively. Two merchantmen went down, several were crippled, and Ohio was hit.
And then it was night – and the time for U-boats, fast attack boats and the Italian surface fleet to sortie… Night was brutal. Range for all ships was reduced to
two. -1 to shoot at anything. -1 more shooting at small ships (-2 of using BB main guns). Thirteen of the Italian fast boats had the hi-speed evasion….which
means that if shot at, you roll and a 5-6 means shots missed (which we turn upside down so that first you roll a die: 1-4 you acquire the target and THEN
shoot…same result, just a little cleaner application). The Axis attack was NEARLY perfect in its execution. Gregg rose from the depths like Poseidon. He had
lost 8 Italian subs, but he had kept 8 alive .. and had held his 5 Uboats in reserve. He rose like an iron wall in front of the convoy – daring them to come
ahead. Mad Mike took the challenge…and the bait. As the convoy elongated, John P. came out of the Northeast with the surface fleet to strike the Allies.
Admiral John turned the Rodney and Nelson to meet him, along with his heavy cruiser (Manchester – we used Exeter) and two of his light cruisers (Nigeria
and Cairo, for which we used Ajax’s). Mad Mike sent some destroyers to help…and Gregg sent three U-boats to support, striking the two battleships again and
again and again…
A swirling, desperate battle. Ships erupting left and right at point blank range. Torpedoes going every which way….Despite a desperate struggle to keep him at
arm’s length, the allies could not prevent John P from getting four of his ships INTO the back of the convoy – to fire away at merchantmen. At the same time, James roared into the convoy. His five torpedo boats (we made up stats, think DE lite) came in from due south – while his 11 fast MBT and two big E-boats (we used US PT for them) swung around, came in behind and INTO the heart of the convoy. Carriers were firing point blank range into MBTs.
It was starting to look like the Alamo – or Custer’s Last Stand at Sea. Ships were sinking everywhere. Torpedo boats were acquired and lit up. Merchantmen
went down. The CVE Argus (we used St Lo) was sunk by the parting shot of the last of the Italian surface ships – a crippled light cruiser – as the Italian surface navy, to a man (or ship) was sunk. And still James came on….on one turn he let loose 16 torpedoes…FROM INSIDE THE CONVOY and got one “6.” --
And that broke HIS morale. Then, finally, with no Italian Flagship (we had given Bolzano a 1 flag) the Allies got the initiative back….and James took his last few fast boats out of the convoy, to regroup… Gregg, alone now, fought on. He could not get to the merchantmen…but put three torpedoes into Rodney and another into Nelson…but their torpedo defense 1 kept them afloat….
Mad Mike finished off the last of the U-boats a turn before dawn (turn 24, the 12th night turn of the game).
During the night the Allies had rolled for and received TWO bomber raids on Sicily (the night without sleep as it was known historically). Each raid had 5
bombers. John P got to roll 6 dice against each plane….needing 5 hits to abort or 8 to shoot it down. Three bombers got through on one raid, four on the
other… They each had 6 bombs…needing 5 or better to damage an axis squadron (a damaged squadron, the equivalent of an abort could not fly at dawn). They
got three Axis squadrons in this way…two of them ME109, one Savoia…but that left FIVE to fly…. John launched at Dawn (turn 25). Needed turn 26 to
fly…turn 27 he struck…Allied air was singularly ineffective…very bad die rolling.
AA was better…but still, a few planes got through….
The Allies were now so reduced in cargo points that they could NOT SAVE Malta for certain – BUT they had enough to allow her to survive – IF, and ONLY IF,
every cargo ship left remained….. John’s three planes that got through the fighters and AA attacked. The JU88 missed. The Stuka missed…the Savoia was hit by AA, but has the press the attack…on a 4-5-6 she could strike, on a 2-3 she would abort, and on a 1 blow up….and John rolled a ONE…
...and as the debris from the last Axis torpedo bomber settled over the Ohio, the game ended….MALTA WAS SAVED – FOR NOW…..BUT ANOTHER CONVOY WOULD HAVE TO BE FORMED…
Twenty seven turns. Five hours.
The Allies got SIX points of cargo from merchantmen through….(one undamaged merchant, one crippled, and Ohio damaged). The other 11 merchantmen were sunk. (Historically, Ohio was crippled, four merchants were damaged – 9 were sunk). It cost them 15 of their 25 destroyers and destroyer escorts sunk…and two crippled. They also lost a CVE, two of the three ASW trawlers/minesweepers. BB Rodney and Nelson were damaged, one light cruiser was sunk, another crippled, a third damaged. No planes were lost. In terms of POINTS of lost ships – 180 points sunk, plus cripples.
The Axis losses were HORRENDOUS. 5 U-boats and 11 Italian Subs sunk. 3 heavy and 3 light cruisers, SUNK. 11 destroyers SUNK. All 5 torpedo boats, both E-boats, 8 of 11 MBTS SUNK. Air losses, 5 squadrons destroyed…..OVER 500 points!
The Allies won – but barely, and at a heavy price – but not as heavy a price as the Axis. The Italians here fought like lions….and while they did not win,
they came within a single die roll of doing so….one more torpedo, one more merchantman…and Malta would have been remained Mussolini’s Island….
BACK TO TOP
Tarawa The Decisive Battle
CTGame club, June 9, 2007
For Tarawa After Action Commentaries and Review of Axis & Allies: War At Sea by CGC members
At the June CT game club I ran a “what if” Tarawa battle. War at Sea miniatures and rules. The situation being that the Japanese decide to relieve Tarawa and use it as the lure for THE decisive battle. This being late 1943, the odds are still not too bad….
 We did 15 turns, 900 points of ships and planes per side…(that comes out to 100 ships, and some 40 squadrons…and yes, I have them all, and all the right ones at that)….although neither team (3 players each) knew that the points were equal, let alone what either side had. The Japanese naturally assumed they were outnumbered, outpointed and desperate….and the Americans, it seemed, thought they had the upper hand as well.
But that is what fog of war is all about, as i did not tell either side how big in points or ships they were...they did not know until the end of the game that they each had 900 points worth of stuff...
We had the 5 x 8 mapsheet i have made. We had Tarawa and an invasion force attacking the island in the southeast, jeep carriers providing cover to the northeast, and a line of CLs and DEs screening the western approaches.. OFF map (we did a paper map) were two US carrier task forces, each with two carriers and escorts…..and an Iowa with one of them, which the
US could detach to send onto the map if they wished….and did.
 I gave the Japanese a stack of cards to show what they had, and told them to organize their forces as they wished. They maneuvered off map on paper. They divided their carriers up into two groups, with escorts, and divided their battlefleet in two...sending on the four battlecruisers etc as the “bait” to draw attention, while cleverly trying to sneak the relief force and the big battleships to the south….
Both sides had search planes and subs they could assign for off-map searching (ie put them in a box, GM...me...keeps track of it, had them roll dice to spot...and if they did, another roll to see how much they saw).
The Japanese at first did not spot either US carrier task force..but a spotter plane told them that, in the northeast corner of the main map (which was hidden from them at start), it had seen at least one “carrier.” The Japanese launched everything at that. When the planes got onto the map, however, they saw that it was only the jeep carriers….at which point Matt clapped with glee at the easy meat, but warren took his planes and veered off, to strike John Passaglia’s battleline….Matt got the Princeton, Warren damaged Tennessee and Colorado slightly.
As the Japanese flew back and landed, the turn they were rearming the skies darkened with US strike planes. Yup, the Japanese were caught, on deck, rearming. This should have been a massacre – but the Americans had split their attack, sending half their planes at EACH of the two Japanese carrier task forces, rather than all against one.
 The American carrier commander clobbered Shoho, sending her to the bottom, planes on board…but all of the other strikes on the other carriers, in both fleets, were either driven off by Zeros and AA…or the US just rolled REALLY poorly.
The Americans came back 7 turns later and hit those carriers again, but again split their forces, and succeeded only in damaging Akagi.
Warren, in charge of the Japanese carriers, figured that “if we have four fleet carriers, the Americans gotta have, what 8 or 9? So let’s not go for their carriers…” instead, he ordered his planes to keep striking on the big map, against US battleships. He even risked sending them in without escorts, so as to keep strong CAP over his carrier fleets….this cost the Japanese 7 of their 9 strike squadrons, but kept the carriers alive…and kept chipping away at the US battleline. This proved crucial.
The Americans, once they spotted the IJN carriers, stopped looking for anything else, and just keep their spotting assets fixated on keeping contact. This allowed the Japanese big punch to slip along the south and come up south of Tarawa, betweeen the American battle line and the beach head (as the us battleline raced to intercept the battlecruisers coming in...which was the whole Japanese plan, to draw away the protection from the beaches)
 Passaglia’s battleships and heavy cruisers, already damaged from air attack, were then caught between two forces – three if you count the carrier planes…and annihilated. Literally and totally. One of the four Jap transports that came in with the big punch to unload the rescue force on tarawa was sunk by a wildcat while unloading, but other than that, the Japanese accomplished their mission…..and the American invasion force withdrew under cover of smoke from destroyers, and the parting salvos of the US flagship, the Iowa, of which the Japanese, having already won the battle, were wary of closing in on…
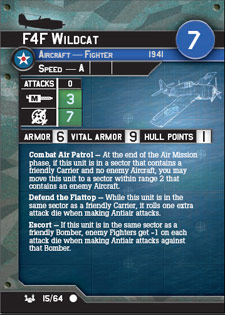
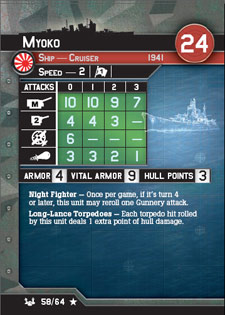
It was a great grand battle. three players per side. Japs lost a little under 200 points (2 Kongo classs BCs , a Myoko CA and a Shoho, plus some destroyers and seven air squadrons) but took down well over 300 points of us (BB washington, 2 tennesee BBs , 3 Baltimore and 2 Salt Lake heavy cruisers, 3 Boise CLs, Princeton, plus a lot of DE and dd, and four squadrons)....
We did this all in UNDER four hours, even with the GMing.
This just goes to show you how with a little bit of tweaking this can be a great, great game.
We played the game straight other than the strategic map bit and some simple die rolling (I did not even bother with a die roll table...if they scored 8 or better on 2d6 they found something, and if they did, they rolled again...and the better they rolled, the more they found out about what they saw)
We DID use the designer’s special rules for:
-maneuvering, arc of fire, facing
-small ships (ie BB main guns hit on 6 only, and cannot hit them at 0 or extended; all other fire is -1 vs small ships)
-all dd/des make smoke (and in the movement phase, and in each box they enter...but can not shoot while smoking)
-engaged fighters
-harrassed subs
and that was it...plus the time to rearm and fly.
We limited the air strikes, incorporating the time/distance to fly from off map - It takes them a turn to launch, another turn to fly to the map, where they strike, a turn to fly back, a turn to land and rearm.
If they are flying to the other side of the map, to the other side's off map, add a turn of flight each way. so.
turn 1 = launch
turn 2 = fly to map and strike
turn 3= fly back
turn 4= land and rearm
turn 5=launch
if they are going off map
turn 1 launch
turn 2 fly to map
turn 3 fly to other side (off map) and strike
turn 4 fly back over map
turn 5 fly back off their side of the map
turn 6 land and rearm
turn 7 launch
This made for a good game and it felt right. Air strikes were important but not constant or overwhelming. The Japanese hit the map three times. The US hit off map twice, and on-map once, at the very end of the game. (Heh, any carrier crew that can get off three strikes in one day has earned their pay for the month...not to mention any pilot that can fly three strikes)
The 6 guys who played the game have asked me to bring it back to the club. I will be happy to do so.
BACK TO TOP
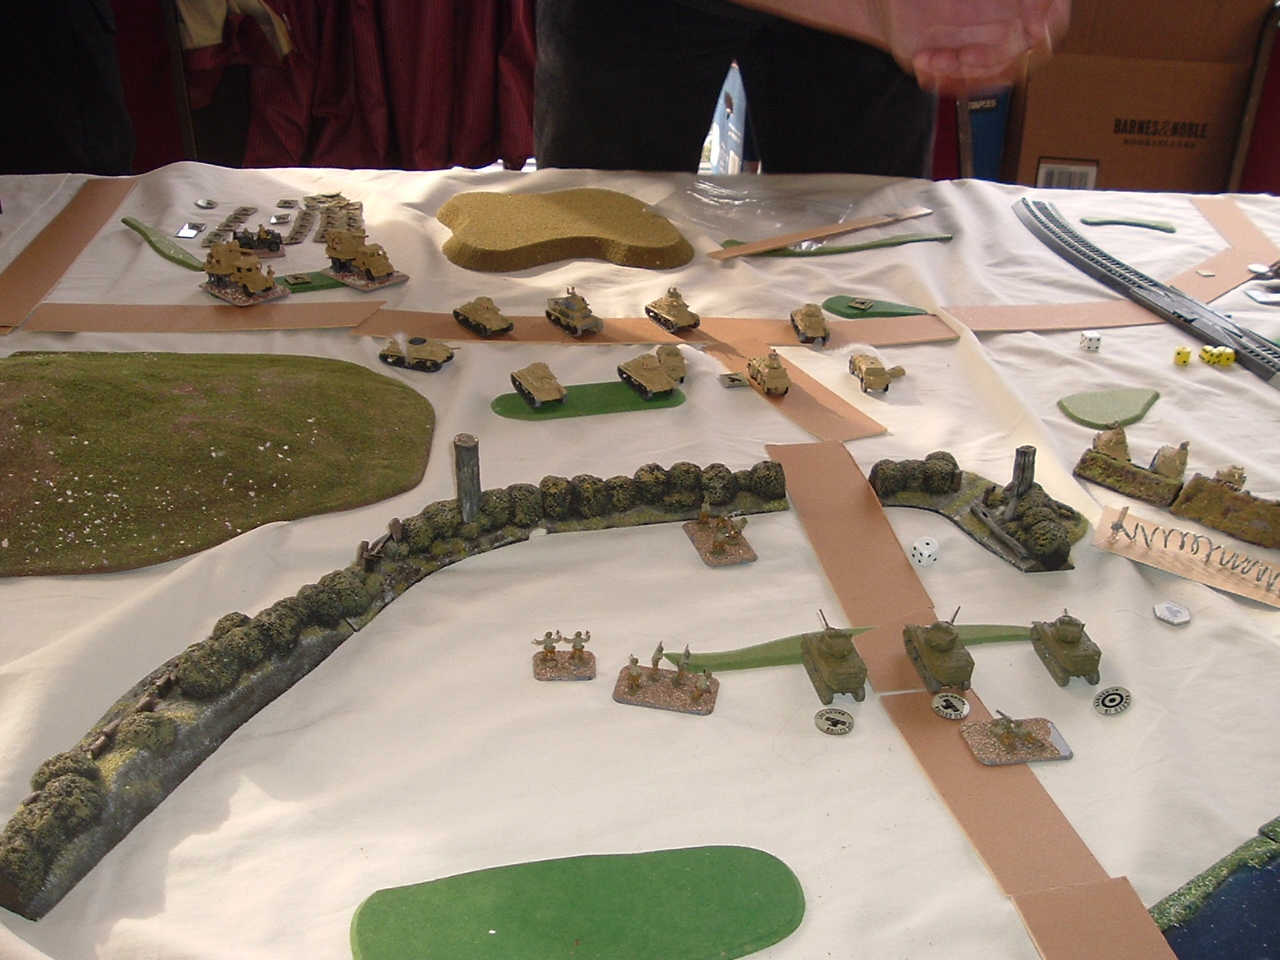
"Phil’s Fight
-Clown Cars and Crusiers, Third Time’s a Charm
Windsor Game Club, June 15, 2007
 If anyone thinks I can pull miracles out of my….hat….with the Italians, they should’ve been at the Windsor Game Club last night, to see how the Italians can perform for one of their own countrymen. Phil Spera took a handful of Italian tanks last night, lagered them up in a Wadi, and, despite being completely surrounded by British tanks and armored cars, some of which broke into his position and drove through his lines and out again, not only held on until La Cavalleria arrived, but broke a British Armored Squadron…and saved the day for Mussolini’s
finest.
This was the Windsor Game Club’s introduction to Flames of War. James Sulzen, a veteran FOW player, led Jeff and Alan as British, vs Mark Kalina and Phil as the Italians. (Phil has played the game a few times). We did the western desert convoy battle again (heh, it is an easy to set up, fast playing feeding game, where things dribble in, great to teach the rules). This time it was an Italian convoy coming on.
 The game opened with a roar not unlike that from last week. Just as Ed in the Pittsburgh club jumped his Sahariana jeeps out from cover to the top of a hill to splatter incoming British recon jeeps, so did Phil. Phil blew up all four recon jeeps – some 40 dices roaring down on the jeeps, which james had moved at the double. Despite destroying their ride, Phil did
not kill a single Brit. All four teams of British commandoes successfully leapt from their jeeps to live …no small feat that. This, of course, left the Arditi sitting exposed on a hill top, and the commandoes, backed by an armored car platoon and Popski’s Army’s jeeps, wiped out the Sahariana squadron – toasting all five vehicles…from which only one team survived….(it managed to claw its way to the road, but then failed the last man standing test and left the field)
Things got even better for the Brits. They could not seem to miss a reinforcement roll. The Italians could not seem to get one. By turn 8, all but one of the British units were on the table; the Italians had three. On the Italian turn 8, with 8 die rolls, Mark got ONE reinforcement.
Things looked hopeless for the Italians. The British were fully formed, roaring on, using their tally-ho ability to fire at full rate of fire while on the move. Alan with two platoons of Crusaders was slowly knocking down Mark’s L6 clown cars, and had a good force of light stuff behind them, ready to make a dash for the road. Things got so bad for a while that
Mark sent his scout cars back off board, up the road, to hold up the convoy. (by doing so, I told him he could not bring them back on until the convoy decided to roll again).
At the far end of the road, Phil was in horrible trouble. He was reduced to a couple of Bersaglieri, who had dismounted from their motorcycles to try and regain the road cut in the wadi from the British commandoes. A trio of Autoblindos managed to attack, push out and break the commandoes, only to find itself surrounded by British light units, with heavier stuff
coming up. A platoon of 14/41 tanks came to their aid, only to find themselves surrounded.
James and Jeff could not miss. They scored hit after hit after hit on the Italian armored cars and light tanks….but they could not close the deal. They kept rolling 1s,2s and 3s on their firepower tests – repeatedly bailing but not brewing up the Italians. The Italians, confidant veterans, kept rolling 4,5 and 6 to remount.
 Then the Italian reserves finally started to roll in. Phil got his Semovente 47s on right next to the embattled light tanks. These engaged with Jeff’s cruisers in an inconclusive duel. Jeff took his two Honey stuarts around the flank of the Semoventes, brewed up the command tank and dismounted another...and then God, who finally decided that he was Italian, intervened.
Mark rolled for reinforcements. The rest of the Italians came on. The second light tank platoon from Phil's company arrived -- and it arrived in the one place Jeff did not want -- dead on the rear of the Stuarts (the reinforcements appeared at random on the owning player's side of the table...Mark rolled a 12 for Light tanks -- right in the back of the Stuarts.
That platoon coming in was led by the company commander, who not only led his tanks to destroy the Stuarts, but also assigned a new commander to the Semoventes, thus allowing them to move forward, if they wished.
They did not have to. The next turn ended it for the British.
Mark Kalina finally advanced in mass to escort the convoy. His 11/39 tanks, with their 37mm guns, and his L6s with 20mm finally swept the three crusaders off the hill, thus making sure the road was now out of gun range of the British. Then they drove forward through the sand -- the road being blocked in the wadi by a burning L6.
Alan still had his other Crusaders, and was ready to engage Mark...but Phil's counterattack out of the wadi brewed up the rest of the armored squadron. Jeff had 1 vehicle left, and Alan's crusaders were all else that remained of the light armored squadron -- and when it failed the morale check, the crusaders left with them.
 That left the British recon company, which still had most of its armored cars alive, to face the entire might of the Italian army -- the British wisely decided to withdraw.
Of the 20 trucks in the Italian convoy, 4 got off the board, 9 were on the table, under heavy escort, and the rest were ready to come on...and not a single truck had even been fired upon.
The Italians lost only two units -- the Bersaglieri motorcyclisti and the Arditi Sahariana. They lost a fair number of vehicles, but despite being heavily and at times even massively outnumbered for most of the game, they made a great comeback. The game was another showing the true-see-saw tradition of desert and armored warfare...although if the British could
have rolled something higher than a “3” in all of those dozens of firepower tests, it would have been an entirely different battle.
Then again, they had to face Phil, lagered up and hull down, leading his fellow Italians...Avanti Savoia!"
BACK TO TOP
Admiral Spera’s Flying Fletchers
Windsor Club, June 1, 2007
 I joined yet another game club (my third now). This one is in Windsor, near Hartford, and meets 1st and 3rd Fridays. Very nice bunch of guys that have been meeting for 25 years – mostly board and collectible card, some miniatures. James has been going for a while and Phil just started.
I introduced them to War at Sea – with a bang, and they really enjoyed it.
I threw together a big scenario. Roughly 650 points on a side. USN and IJN each had a strong surface force heading for each other, with the US having a small task force of 2 jeep and one light carrier on the table. The main carrier fleets in opposite corners – with the caveat that they were NOT on the actual map, could not move onto the map nor be attacked by ships on the map. They could strike the battlefleets on the map at will, but would need to roll a 5 or higher on 2d6 to find each other (the roll was done secretly, and their planes assigned secretly, as I acted as instructor and GM)
 The Americans had more aircraft (13 sdns vs 10), but the Japanese had more destroyers, and of course their torpedo advantage. The Japanese had 4 kongo battlecrusiers to the three American battleships (Tennessee, Colorado, Washington) – which come out to the same point total. Both sides had a lot of heavy and light cruisers.
We used all of our Pittsfield club rules.
The air duel got off to a strong start, with both carrier fleets spotting each other. The two carrier commanders threw everything at each other. Enterprise took a single hit. The Japanese lost four squadrons. The Americans took out Shokaku. On turn 3, they did it again. Wasp took a hit. The Japanese lost another two squadrons. The American airpower
also took heavy losses – but sank Akagi. Turn 5 was the last big carrier to carrier strike. Americans lost two squadrons, but sank Zuikako, and hit Hosho.
 The Japanese did not even try for the American carriers, but sent their last strike planes after the American surface fleet --- severely damaging a light cruiser.
This strike, on turn 5, came just as the surface fleets were beginning their engagement. Art (of the Windsor club) was pushing his battleship division around and the American line, and managed to catch Phil’s American battleships flatfooted, crossing their T. Unfortunately for Art, he failed to hit them. Art managed to sink two American light cruisers, then
kept pushing Northwest, however, aiming for the jeep carriers, while Phil turned his force due East, into James’ Japanese cruisers and destroyers.
Herein came Phil’s mad charge with the Fletchers. In pairs, half of them pouring on smoke, came a dozen Fletchers, with the heavy stuff behind. James’ kept coming on, closing the range. Gunfire took down a few Fletchers, then James’ launched torpedoes from 16 destroyers and cruisers – without scoring a single hit!
 Phil kept on, pushing his destroyers right into the teeth of the Japanese cruiser and destroyer force. By this time Phil was in so close that he was using his guns to target the Jap cruisers. It was a daring move – and it cost Phil 11 of his 12 Fletchers – but it broke the morale of the Japanese players.
With their fleet carriers gone, and down to a couple of zeros (now land based) and a single dive bomber squadron, the Japanese were already starting to despair. Although one Kongo had taken 3 hits and another 2, the battleline was still pressing forward, even managing to knock out a DE in the jeep carrier screen….but the cruiser/dd force had taken a licking.
Four Yukikaze class destroyers sunk, a heavy cruiser sunk, another crippled…..and, coming through the smoke laid by the now dead Fletchers, a line of three American battleships and five heavy crusiers – none with so much as a dent, and closer to the weakened jap cruisers than their own battlewagons.
At this point, the Japanese conceded….and it was 11 pm, a good time to pick up.
Final losses: Japanese lost 200 points (3 CV, 1 CA, 4 DD, 6 sdns – plus several crippled ships). Americans lost 150 points (11 DD, 1 DE, 2 CL, 5 sdns).
The three Windsor club guys very much enjoyed the game, as did James and Phil (who, of course, are also both Windsor clubbers now too).
I think I know where I will be spending my first and third Fridays of the month from now on….

BACK TO TOP
Sicily 1943
Race for the Crossings
Sat. April 15, 2007 At the CGC
 A strong American company (2,800 points) is racing out of the Sicily beachheads to secure some key roads into the center of the island. A free air strike will preceed them, helping to clear the way for a parachute drop by a platoon from the 82nd. Half of the American land units were right behind, entering the board on the turn after the air-drop, the other half were off the board, entry on a reinforcement die roll. The Americans had to say which of the six roads each of the reserve platoons were to enter the board from.
 On the board was a weak company (440 points) of Italian Fucilleri. They were set up in four small strong points covering the rail bridge, two passes through a ridge and a major stone bridge over a river. Each strongpoint had 2 rifle teams, an officer, a 47mm at gun and a machine gun. The company commander and the 81mm mortars were dug in at the central
crossroads, behind the ridge, with the observer in a ruin on the ridge.
Two Italian companies were on call in reserve. A fucilleri company (1,035 points—with a batty of 105s, a btty of regimental guns, two small infantry platoons, a pair of trucks with 20mm AA and a platoon of semovente 90 mobile AT guns) and an armor company (1,235 points with a total of 7 m14/41 tanks, 3 L6 tankettes, 3 armored cars, four semovente 75 assault guns and a pair of the lancias – think german 88s on a truck)
The Italians had six roads to come in on. Three for each company. They got to roll double dice for reinforcements, but then had to roll which company, which unit in the company and which road each would come in on.
Both sides had five dice of air power.
 The American free air strike (not part of its five dice) missed. The airdrop aimed at one of the two central Italian positions. The Dakotas flew over (yeah, we had the models) and scattered 10 teams over a three-four long, foot wide swath. Only one of the 10 teams died in the drop. A third of the teams landed right near the Italians, another third not far
behind and the last third well in away from the Italians. Unfortunately, all of their weapons canisters landed on the OTHER side of the Italians. Still, the air drop went pretty well at first, taking the ruin where the mortar observer had holed up. The paratroopers held on to that ruin for at least half of the battle – but, alas, the amercian ground forces
just could not reach them in time – not that they did not try!
American luck, well, sucked. Everything that could go wrong on a die roll did. American planes failed to arrive to block Italian air strikes. American reinforcements showed up at a painfully slow rate. American artillery kept failing to find its targets!!!! (when you have three rolls per battery, and two batteries, and you usually need a 4-5-6 or in some cases a 3-4-5-6 on ANY of them….well, sigh)
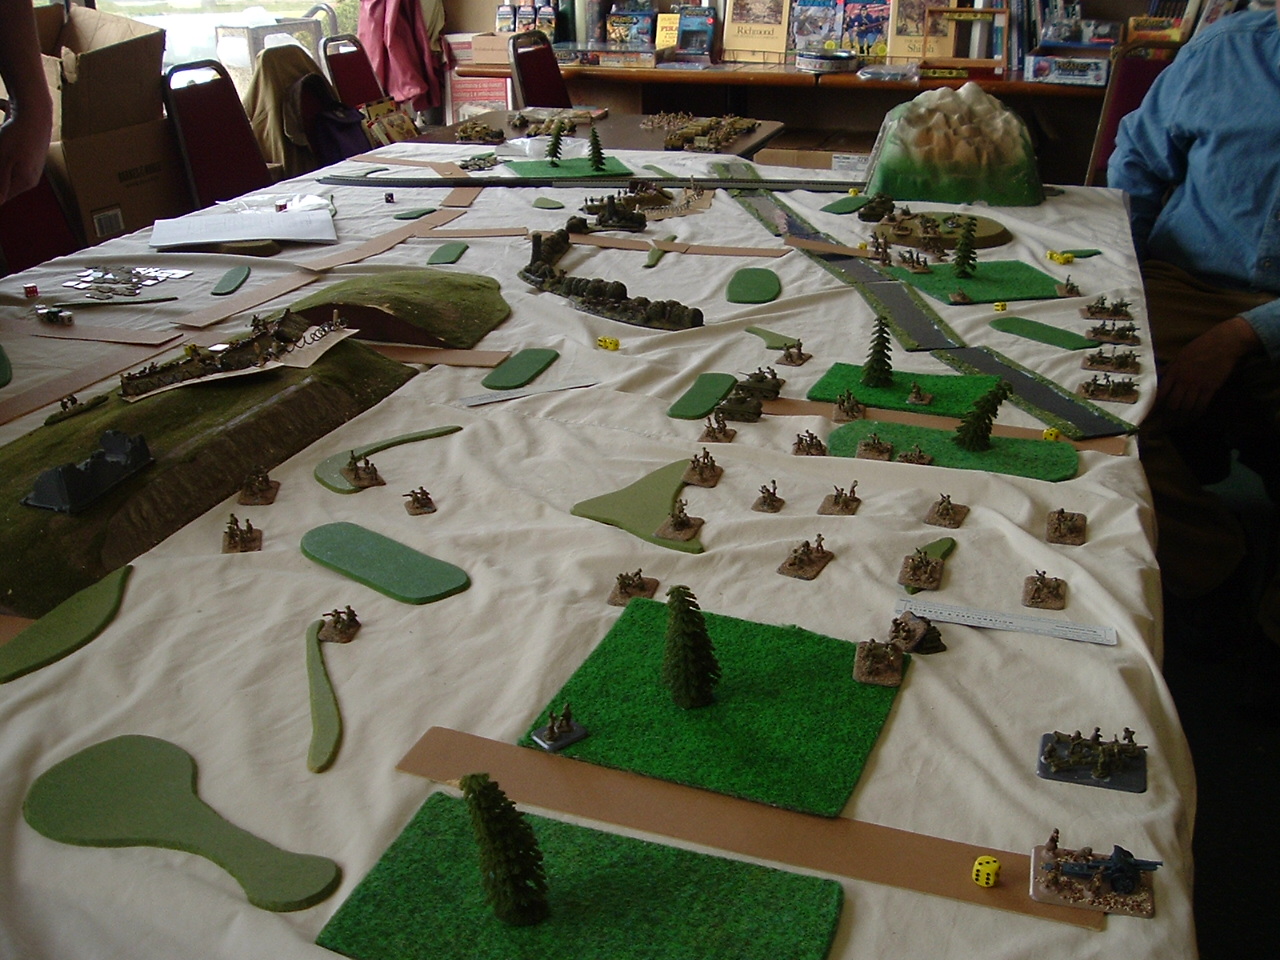 The Americans came on in small groups. Tom Cusa with the Stuarts and one platoon got hung up in front of the Italian platoon that was dug in by the railroad. Tom eventually wiped that platoon out (part of John Passaglia’s command), but by then the Italian armor showed up to engage him – he knocked out two of the three autoblindos that bravely charged forward hoping to stop the American advance, but then the L6’s (who were a distraction for comic relief) and finally the “real” tanks (the 14/41s) showed up. Sheer volume of
firepower finally resulting in all of Tom’s Stuarts being bailed, and his infantry platoon was shredded.
 In the center, James Sulzen tried to assault the ridge and link up with the paratroopers. It was like Gettysburg. He brought down smoke on the Italians to cover his charge – but when he charged through the smoke John Passaglia’s boys were there waiting for him. First charge never even got into hand to hand. James regrouped, poured more fire down on the Italians, pinned them, charged and got into the trenches…but John Passaglia’s fucilleri refused to break, countercharged, and drove the Americans back out!
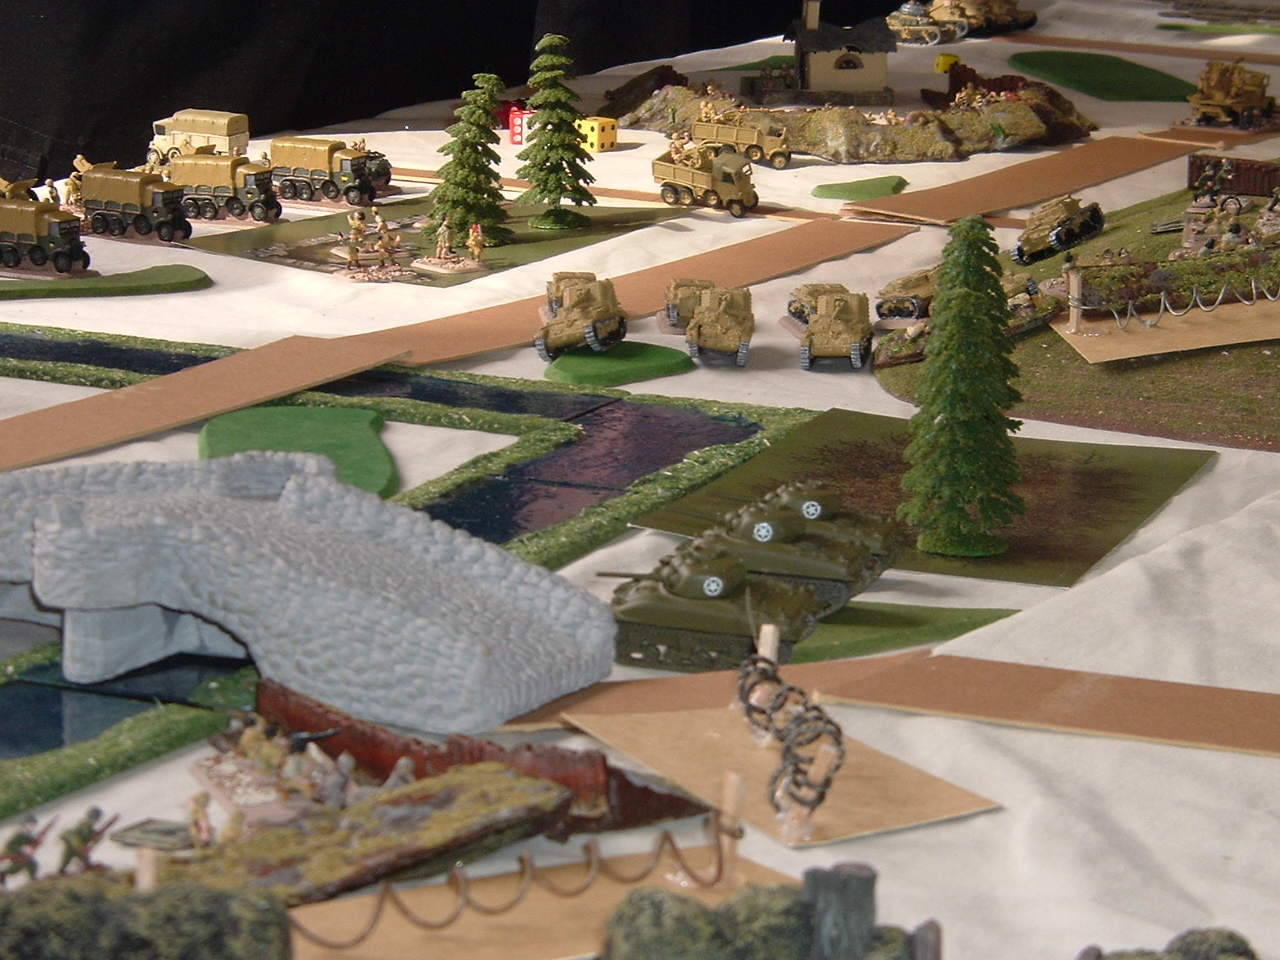 On the other flank, one platoon of sherman’s got bogged down in a wood and never unbogged. The other made it to the river, was bringing fire on another of Passaglia’s covering force, helping a rifle platoon move up – but then John Demeter brought up his 100mm guns and in their first and only barrage, knocked down the rifle platoon. (That battery had driven at
double-time up a road, had been targeted by American air which MISSED!!!! – usually trucks towing guns on a road moving at the double are the absolute dream target for the attack planes … but when you can’t roll higher than a two on a die, even they get away). Then his Semovenete 75s – not even the GOOD semoventes – brewed up all three shermans on the river.
At that point the Americans threw in the towel.
The Americans had abysmall, horrible, and unusually awful luck. We all agred that James should melt down his box of yellow dice. The Americans never concentrated their forces, and the one good strong assault went in, well, backwards, with the smoke covering the advance but also blocking the supporting fire.
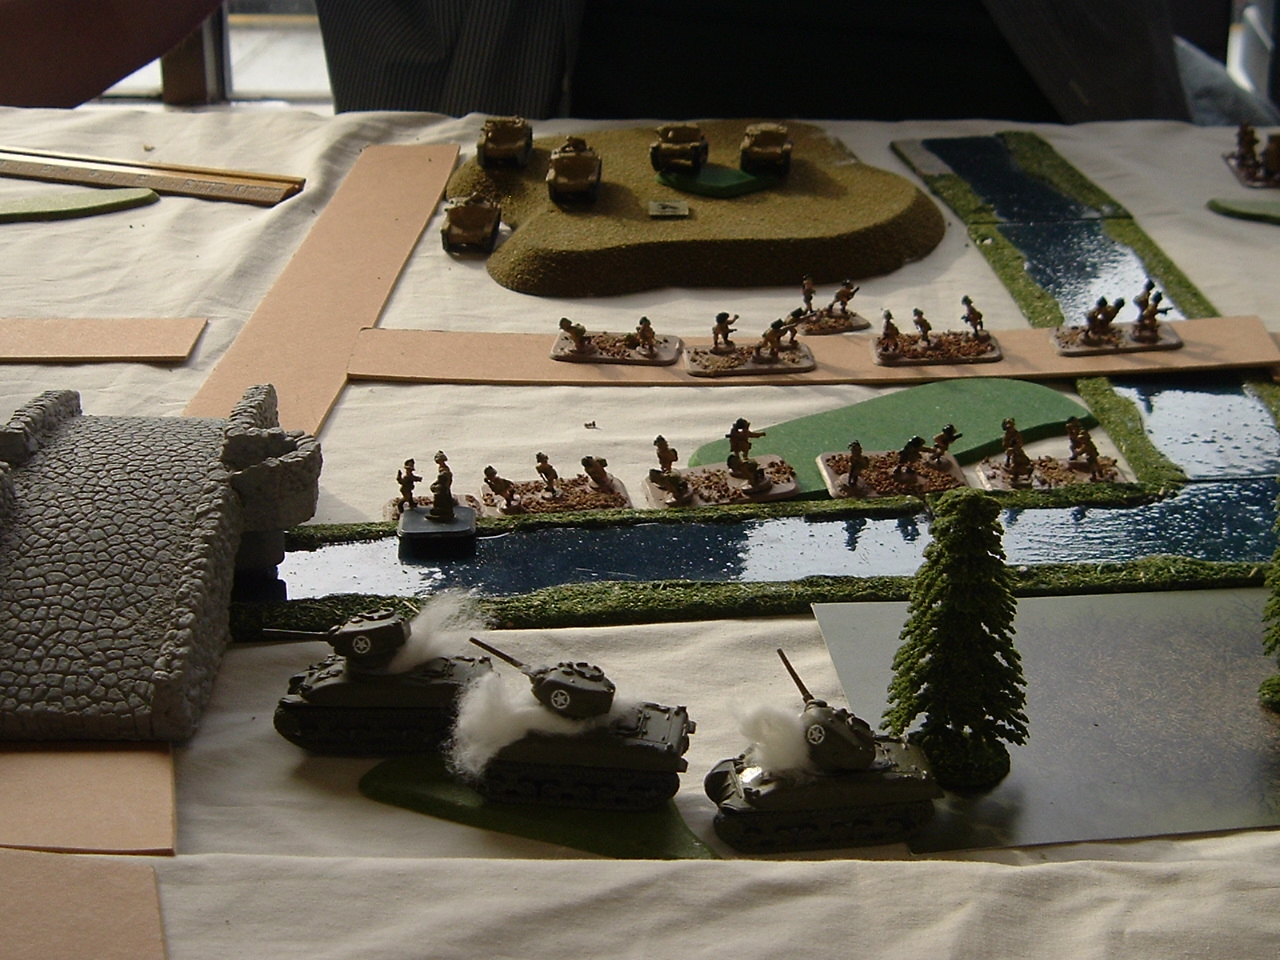 Italians had much better luck. Their reinforcements came in very timely and quickly and most came where they were needed. John Passaglia rolled well to hit, rolled even better to hold his ground and rolled well in the counterattack. The guy in charge of the Italian armor never rolled well enough to blow up any stuarts, and lost three of his own armor, but he did bail them out – and Tom Cusa tried hard, but his Americans were just overborne by numbers on that flank.
It was not, of course, all luck. The three Italians, led by John Demeter, reacted well, fought well, and kept their heads.
So, the Italians win another one….
BACK TO TOP
AMERICANS HOLD THE LINE
CT game club, March 10, 2007
This battle gave new meaning to the words “dug in.” We have never had so much terrain, or so any fortifications, on a field, as we did here. It was supposed to be Italy, around the Gustav Line, and it looked every bit of it – even to the point of adding lots of little strips of slightly raised rises” in the ground to break up lines of sight on the low ground.
The Americans elected to defend. A 2800 point rifle company, of which half would be on the table at start, the rest in reserve. They got 160 points of defensive works (about 40 points based on the number and type of platoons, plus 120 in “additional” fortifications –ie 15 pts per foot of frontage) enough to cover the entire 8 foot front in wire, mines and trenches, plus 32" of dragon's teeth and enough for a lot of strong points in a second line, and a bit of trench left over for some ‘medal of honor’ positions at that.
(On inspection after the game, James noted that he did by honest mistake place about 40 points more of fortification than he should have, for which he is heartily apologetic and for which I take the blame for not noticing, as I was gm’ing – it would not, however, have reduced the strength of the first line, but it would have cut down significantly on the minefields back in the second line -- although the germans attacked only on about a two foot wide attack on the 8 foot front_)
The good news of lots of fortifications is, of course, offset by three bits of bad news.
1. Half of the defender is off the board, and rolls for reinforcements do not start until turn until turn 3 --- and if luck is bad, they show up too late, if at all
2. Defensive airpower is reduced by one level (if you buy priority you get limited, if you buy limited you get sporadic)
3. A massive pre-attack bombardment that hits every base on the board with a 4-5-6 chance of hitting it….and ALL defenders are pinned down at start.
James, a guy named Tom and Russell, a friend of my son’s, took the Americans. Two batteries of 105s, two units of mortars, two rifle platoons, with AT guns, held the line. In reserve, more infantry, shermans and stuarts.
The 2800 point german panzer grenadier army I had built to attack this was selected to create a hard, fast-moving, powerful blitzkrieg force, with armor, arty, 88s, panzer grenadiers, motorcycle troops and even an assault engineer platoon. German troops have a 2/3 chance of moving unscathed through wire and mines as it is, but with engineers, this gives them a good chance to clear a wide lane. Lots (13) halftracks in this force, two with mortars, 1 with an AT gun and the rest with machineguns….and Stukas
John Demeter took command. Matt (another friend of my son’s) took the motorcycle troops, Big Matt Roos (or “Our Matt” of the club) took the other panzer grenadier, and John Pasiglia took the engineers. Tom Cusa got the Panzers and STUGs.
The initial bombardment was very good for the Germans, at least in terms of thinning out the US infantry – and it did knock out two of the 8 big guns in the back.
The germans elected to attack on a very narrow front on their right. They moved up toward but not to the wire with the engineers, electing to smash through the wire with the panzers.
The Americans got back to their guns pretty quick, and smoked one of the engineer haltracks. This proved critical, as it pinned the engineers – who, with incredibly bad luck, REMAINED pinned for FOUR TURNS (even with the company commander rolling over and re-rolling for them). The other armored panzer grenadier plt also took heavy fire, but the panzers, despite several breakdowns, did push through the American line – but their supporting force lagged.
The Germans cut a very thin hole through the American line, and funneling troops forward proved slow. The engineers inability to do anything, and the luftwaffe’s failure to appear, or, when it did, to do largely nothing, did not help. Worse, the two tanks that made it into the second line got smashed by 105s bombarding down upon then – and when the Stug SP guns
got to that position, in came the Shermans (turn 3, US got ONE die for reinforcements and made the roll).
Tom popped two Shermans, bailing their crews, but that duel ended on turn five when the Americans got three dice for reinforcements and rolled successfully on all three – so in came the stuarts and the M10s, and between them and the stuarts, the German panzer spearpoint died.
Although young Matt had gotten his motorcycle troops through the gap and dismounted to successfully assault the US second line, by then the Grman player morale had broken.
Not only were their tanks dead, but their 88’s and observers were swathed in American smoke, and as such could not see to shoot (had the Americans failed to bring down the smoke, which they needed 5+ to do, the 88s would have swept the field of the Shermans – and then there might still have been a battle.
German losses, other than the armor (4 tanks, 2 stugs), were minimal (1 halftrack, 4 bases of
infantry) but the combination of so many things going wrong just proved too much. The Germans elected to withdraw.
In retrospect, I could have changed the mix of German forces. The HMG platoon in motorcycles got through the lines and deployed, but never fired – by dropping those I could have had another MK IV. Dropping out one of the pz gren infantry units (the ones on bikes or trucks) could have bought me two MK IIIs…
I still think the engineers were a good idea (with their 7 halftracks, 2 flamethrowers and tank assault rating of 4 they could have taken out the stuarts and m10s, and could have given the shermans a run for their money – and their ability to clear mines and wire was of course why I bought them…..besides, who assaults such a position without them! but that was 335 points, enough for 3 MK IIIs
I could also have built two smaller companies (one of infantry, whose rifle/mg teams are less expensive then the pzgren mg teams – and of course who do not have to buy trucks, motorcycles or halftracks), and that comes with infantry pioneers – plus you can still buy the divisional pioneers. That would have freed up more points for tanks…but, especially with the 88s, I
thought there was enough.
Anyway, perhaps we will never know...had the Germans not had such bad luck with the engineers, and the Americans not had such phenomenal luck in getting their reinforcements in early, the panzer grenadiers might have done what they were built to do – punch a
hole and rush through into the allied rear……
A good, tough fight done in three hours.
BACK TO TOP
Shermans and Stuarts, Stugs and Pumas
March 2, 07
My friend James from the CT Game club came up today, with his pal Todd, -- and they brought EVERYTHING James has painted: 2800 points US: -5 shermans, 5 stuarts, 2 batty’s 105s, bofors guns, 57mm towed AT guns, M10 Tank Destroyers (a pair), 81mm mortars, 60mm mortars plus three rifle platoons with their assorted LMG, HMG and Bazookas. And P38 Lightnings.
all of it extremely well painted.
I took a German Armored Recon Squadron (aufklarungsschwadron): 2-88s, batty 105s, 2 towed 50mm AT guns, pair of 20mm AA halftracks, 2 Stu Fs, a panzer plt with one MkIVf2, 3 MKIIIn, a platoon of pumas (armored cars, lousy armor, but with 75mm guns), mortars, hmg (in motorcycles) and three pz gren plts (one each on trucks, halftracks and motorcycles), plus
Stukas.
It was Tunisia. To the North was an oasis, below that a wadi cutting e-w, then toward the center a hill with a ruined building (the “observation tower”), then a rail depot (with shell holes all around as rough ground) then another oasis along a stream with a bridge – those we all in the middle, and were the objectives (bridge, rail station, tower, northern oasis).
James rolled and got choice of sides (he took west) and we rolled to see who came in first (me).
As agreed, we would bring half our platoons on at turn 1, half on turn 2.
I started with my stuFs escorting the 88s to a hill overlooking the rail station, then the 50mms and mortars in the center, and the 105s escorted by the AA halftracks in the north. Americans brought their armor in so the shermans came right on to face the 88s – and took out one. Their stuarts moved along the river to keep that oasis between them and the 88.
they brought a lot of infantry in to the center.
Turn 2 my StuFs burned two shermans. My armor (Pumas and panzers) came in and came up to the river to engage the stuarts (burned two, bailed another). I sent my motorcycle infantry toward the station, my motorcycle hmg and halftrakcs toward the tower and my trucks with panzer gren up the wadi. He brought in the rest of his stuff – mostly on the northern sector.
Turn 3 saw the end of the US armor – it also saw the end of the motorcycle pz grens who had seized the station. American infantry wiped them out to a man. The Panzer gren in halftracks, however, raced up to the area by the tower so they could use their hmgs to gun down the still towed 105s – wiped out an entire battery. The german infantry then dismounted.
They did not live long. Six out of seven died.
The fourth turn the halftracks took out the bofors guns, but were then wiped out by a combination of the tank destroyers and American infantry assaulting them.
The german armored thrust, however, starting going after US infantry in the bridge, oasis and rail station area – even plowing through a layer of smoke the Americans had laid down, so I had to bring them in close. On turn 5 The American platoon that seized the rail station got the same treatment as the late motorcycle plt of mine did.
German AA halftracks moved forward, darted up and gunned down the crews of the other 105 batty – getting three out of four of them (incredibly lucky Firepower checks against their gunshields) and panzer grenadiers took out the 57mm’s.
Turn 6 was a clean up turn, with the Americans conceding. Half of their platoons were gone, and some of those left around were not in good shape – and they had no way left of stopping the German armor, as all of the American armor, artillery, at and aa were gone.
Luck was definitely a German lady today.
BACK TO TOP
Lord of the Rings After Action Report:
An Orc Point of View
 I, Glurg, of the fighting Uruk-hai, attest that this is so.
I saw it all from the other battlefield, where we was minding our own business, me and 300 or so of my Uruk-Hai brothers, goblin cousins, Harradrim
friendsesss and troll uncles, peacefully traipsing up a road, doing no harm to no one, just pushing along some wagons of dead meat, barrels of mead and a few
siege towers, battering rams and catapults when, from like out of no where -- and literally dropping from trees - we was cruelly and unprovokedly set upon by
300 of them pretty boy woodelves, highelves, rangers, Gondor guards and a dwarf.
Nasty surprise that was.
But they don't call us the FIGHTING Uruk-Hai for nothing, no sir, you can bet your white hand on that!
Me and my boys, we broke right and charged right into them pretty boys, while our cousin, Red Rufus Austin of Cirith Ungol took his boys and broke left, and Big Jack the warg rider drove right up the road. No sitting and huddling and going on the defense in this ambush, no, no, no.
Fighting was fierce it was. And we was struggling, especially when Ian Legolam shot the two big trolls pushing the siege tower and got another of them big dumb bastards pushing the ram, just as this giant walking tree and the dwarf come barrelling out of the..well..trees.
And then the horns. Damn horns. Yeah. The Rohirrim...and the guy in white, with the big flowing beard (no, not Dave, he was Gimli)...and older Eric and his trample trample trample riders come tearing into the head of the column.
Damn good thing the Witch King showed up when he did -- and talk about a pimped out ride! One hell of a beastie he flies in on!
Not that that did too much good, as the beastie became a pin cushion and the old king hisself wound up surrounded by "heroes" -- yeah, that's what these "good" people call three guys in capes and unkempt hair who swarm one guy whose been dead for 3000 years...
 But, just as things looked really bad...the Harradrim cavalry, which I, Glurg, had jealously hoarded in the center of the column, went on its death or glory ride.
Half of them went for Treebeard and Gimli, and that big elf that was with them, the other half went to save the Witch King's butt....and they did.
Sure, they died for their trouble, but they did it. They saved the Witch King. They killed the big Ent. The goblins finished up the last of the wood elves, clearing the forest and the ruins on the right, while the fighting Uruk-Hai built a semicircle of 20 crossbowmen to give cover fire to OUR Urukhai heroes who battled their way into this elven firebase on the left (the one the elves called alamo).
Big jack the warg rider (alias the Witch King) finished off the last of the Rohirrim...and the old man in white.
Victory.
Heh, any battle that starts with over 600 figures on the table and ends with less than 50 alive is not just a good game..but a GREAT GAME!....and all in only three hours.
--A tip of the troll cap to Ed, who brought the 600+ 40mm LOTR figures and lots of neat terrain, ruins (ruins john spiess once built for his ww1 game, I might add).
The figures all come on individual plastic hexagonal bases with the stats on them. We did not use the sliders for lives (except for the heroes) saying that every hit on a minion was a kill instead. The result was that we litterally scooped up the dead in handfuls every turn.
What glee.
BACK TO TOP
Race On the Steppes
A Flames of War After Action Report: CT Game Club Feb 10, 2007
 Obergruppensturmbanfuhrer Andy von Zartolas made a welcome return appearance to the CT game club on February 10 – and he brought a team of new gamers with him. Andy and his team took control of a German armored recon squadron on the steppes in 1942. Their mission was a dual protect and probe. They had to make sure that the Russian Cossacks and mechanized recon could not reach their end of the table to “see” behind the German lines, while at the same time the Germans wanted to penetrate the Russian screen and reach their end of the table for a look of their own.
The Russians had the same mission. Opposing the single big German company (3,500 points) were two smaller Russian companies: one of Cossacks (commanded by Bert Fishman and John Pasiglia) and one of Mechanized Recon (led by Jim Franklin and John Demeter). The two Russian companies totaled 3,500 points. Both had air support (the Germans seven dice of Stuka, the Russians five dice of Sturmovik).
The Germans had the advantage of seeing WHERE but not exactly HOW the Russians would set up. They knew the Cossacks were coming from the Northeast corner of the table and the Recon from the Southeast. They also knew the deployment areas of the Russians. The Germans had 10 minutes with the table to make their deployments. The Russians could then come in, see where the Germans were, and adjust their units within their deployment zones.
That was game turn ZERO. EVERYONE had to start towed by or mounted on their horses and vehicles, with no one deployed or gone to ground.
The terrain was flat – but Steppes flat. That meant NO elevations, but two large depressions, a low rail embankment running diagonal from southeast to northwest – with shell craters around a wrecked train in the middle – an easily fordable stream running from northwest to the eastern center of the board, with a few bits of rubble on the Russian side of it.
In short, NO cover for armor, but some cover (not bulletproof tho) for infantry and guns.
The commanders rolled to see who would go first. The Russians elected to kick off – and did so with Sturmoviks pouncing on the towed German 105’s. The Luftwaffe fighters did not show up, and the German light AA could not drive off the flying tanks. The Germans only lost one gun, but the battery commander and the staff table were killed when their halftrack
was blown up.
Both sides advanced, with Andy refusing his left along the line of the stream, using all of the German light units (the five platoons of MK IIs, the light armored cars, the AT guns and the panzer grenadier weapons platoon). Their job was to hold off the Cossacks – and almost exclusively horse-drawn force but one with a good deal of horse artillery (1927 infantry guns, 76mm AT guns, mortars, tchanka machinegun chariots) and all under an umbrella provided by four 37mm AA guns. Bert and John P. did ave one unit of T-60 light tanks – slightly better
than the MK IIs but not by much. Although greatly outnumbered in armor, Bert went forward, with John P. giving him fire support.
The Cossack vs German lights battle was a hard fight. The Russians came forward, then so did the Germans. An initial head to head duel of armor devolved into a swirling effort to get on flanks, and to the Russian armor eventually crossing over to the German side – but only after the crippled German armor had pulled back. Tank losses were brutal on that side of the
field, as most of the MK IIs and the light armored cars along with all of the Russian T-60s were destroyed. The Russians lost their guns, and the tchankas were mown down by a German HMG platoon. The result was a bloody stalemate on that half of the table.
On the other flank, the German Puma heavy armored cars led the German main push – supported by the MK IIIG platoon (the heaviest tanks on the table) and PZT38s, with mobile 20mm AA halftracks providing cover, the 105s offering fire support and two German armored panzer grenadier platoons taking the rail embankment and gully. A third platoon of infantry
(the motorized one) held the center of the table, with the mortars of the heavy weapons platoon behind the wrecked train.
The German advance was stalled by John D and Jon F’s T-70s and the guns of the aptly named “tank destruction company.” Russian heavy armored cars – good guns, lousy armor – and light armored cars – supported by mechanized infantry in scout cars pushed on the German infantry.
At one point the PZT38s made a dash to get behind the Russian T-70s, but failed to knock them out. Caught in the flank and rear themselves, they evaporated.
The Germans fell back onto the defensive, figuring they could not win by probing, but could fight for a draw by stopping the Russian probe – or perhaps gain a win by breaking the Russians before they themselves broke. It was a tense situation by the time the airpower ran out – seven platoons on each side broken. Unfortunately, the seven Russian platoons were split between two companies, so neither was close to breaking. The seven german platoons were from a single company – a company of 16 platoons – so things were a lot worse for them. Andy suggested that the Germans would at this point have called it a day and pulled back, yielding the field to the Russians. One of his commanders thought it was a loss, another a draw and a third wanted the proverbial one more turn to see…that stretched on to three more turns – three very, very hard fought turns.
John D. hit the German infantry in the gully. His first attack fell apart. His second destroyed a German platoon. His third assault got into the gully in hand to hand. His light armored cars got around behind the germans, were a move away from either the 105s or the board edge – but then were in turn destroyed by the halftracks of the last German infantry platoon.
At this point, John P. made his push up the middle with two platoons of dismounted Cossacks. He headed for the train wreck – out from which rose up a platoon of Russian snipers that had been hidden and held back in ambush since the start of the game. The snipers pinned down the German mortars long enough for John P’s mortars to finally range in on them – and the Cossack infantry wiped out the German motorized infantry platoon in the center.
And with that, the German morale broke.
Of 16 German platoons, 10 were destroyed. The Russians lost 9 of the 18 platoons they started with (6 of the 12 cossack platoons, 3 of the 6 mechanized recon). Although both Russian companies were AT half, neither were below half. The Germans fell below half when they lost the 9th and again when they lost the 10th of their platoons – and although confidant
veterans, that mean only a 50-50 chance to stay on the table – and they passed once, but failed the second time.
Game to the Russians….
We started playing at 230 and were finished by 630. Eight gamers, of whom one (John D) had played the rules twice before, and another (Andy) once before. Hats off to John D for helping to run the firing on that half of the table (and who made only one mistake – and one NOT in his favor) and for Bert and Andy for helping out over on that side.
Bert, unfortunately, had to leave about a turn before the game ended – and at a point when the issue was still in doubt….
A WEEK OF WAR
-being a compilation of reports on the battles of
August, 2006, Namely:
-Bir Hachim (FOW 1941)
-Le Derniere Chevaucher (FOW 1940)
-Russians at the Wire (FOW 1943)
-Panzers and Renaults (FOW 1940)
-Whip the gun teams (FOW 1942)
-A little Battle in Virginia (Fire & Fury 1862)
- Wake Island (Memoir 44 Japanese Expansion)
BIR HACHIM
This is based on the battle for the Bir Hachim box, at the far end of the Gazala line. The Free French (including Foreign Legion) are dug in – lots of AT guns, HMG and LMG, plus mortars, AA and even 105’s. Three layers of fortifications. 1,800 points of French – but, as they are legion and surrounded and fighting to the death, I boosted them from confident trained to fearless veteran…. That made them worth at least 40% more (20% boost from trained to vet, another 20% from confidant to fearless)
They were attacked by Ariete Division and 90th Light (German, motorized). The Axis had 5,000 points – and
priority air support. The germans are all confident veterans of course, the Italians roll for each unit – but as they are bersaglieri, armor and artillery, most are also confident vets.
We only showed three sides of the box – as the axis could not operate on the fourth side, the side facing the next box up the line.
The axis had six turns to take the command bunker in the center of the French position. After that, the French, if alive, got to roll for reinforcements – one die turn 7, two turn 8 etc. if they ever got ANY reinforcements the game was over – ie the cavalry riding to the rescue forces the axis to break off the attack and face the incoming british armor….
It was a hard fought battle. Chris took heavy casualties the first three turns getting to the line, but by then the constant banging away of german and Italian armor (they had a LOT between them), artillery (also, a lot) and even small arms and HMG fire (and they had no shortage) finally thinned out the French enough for the axis to actually assault. They came on in waves, and took the French first line. The second line, which was scattered supporting positions fought well, but a pair of Stugs finally broke through into the command bunker itself, which they took in close assault against the legion commander…on turn 6…the turn before the French would roll for the cavalry.
It was Chris’s first time playing FOW – and he was able to handle 5,000 points of combined arms, and win, and do it in just over 3 hours.
(PS: A German victory with an Italian assist, as the germans got to the bunker)
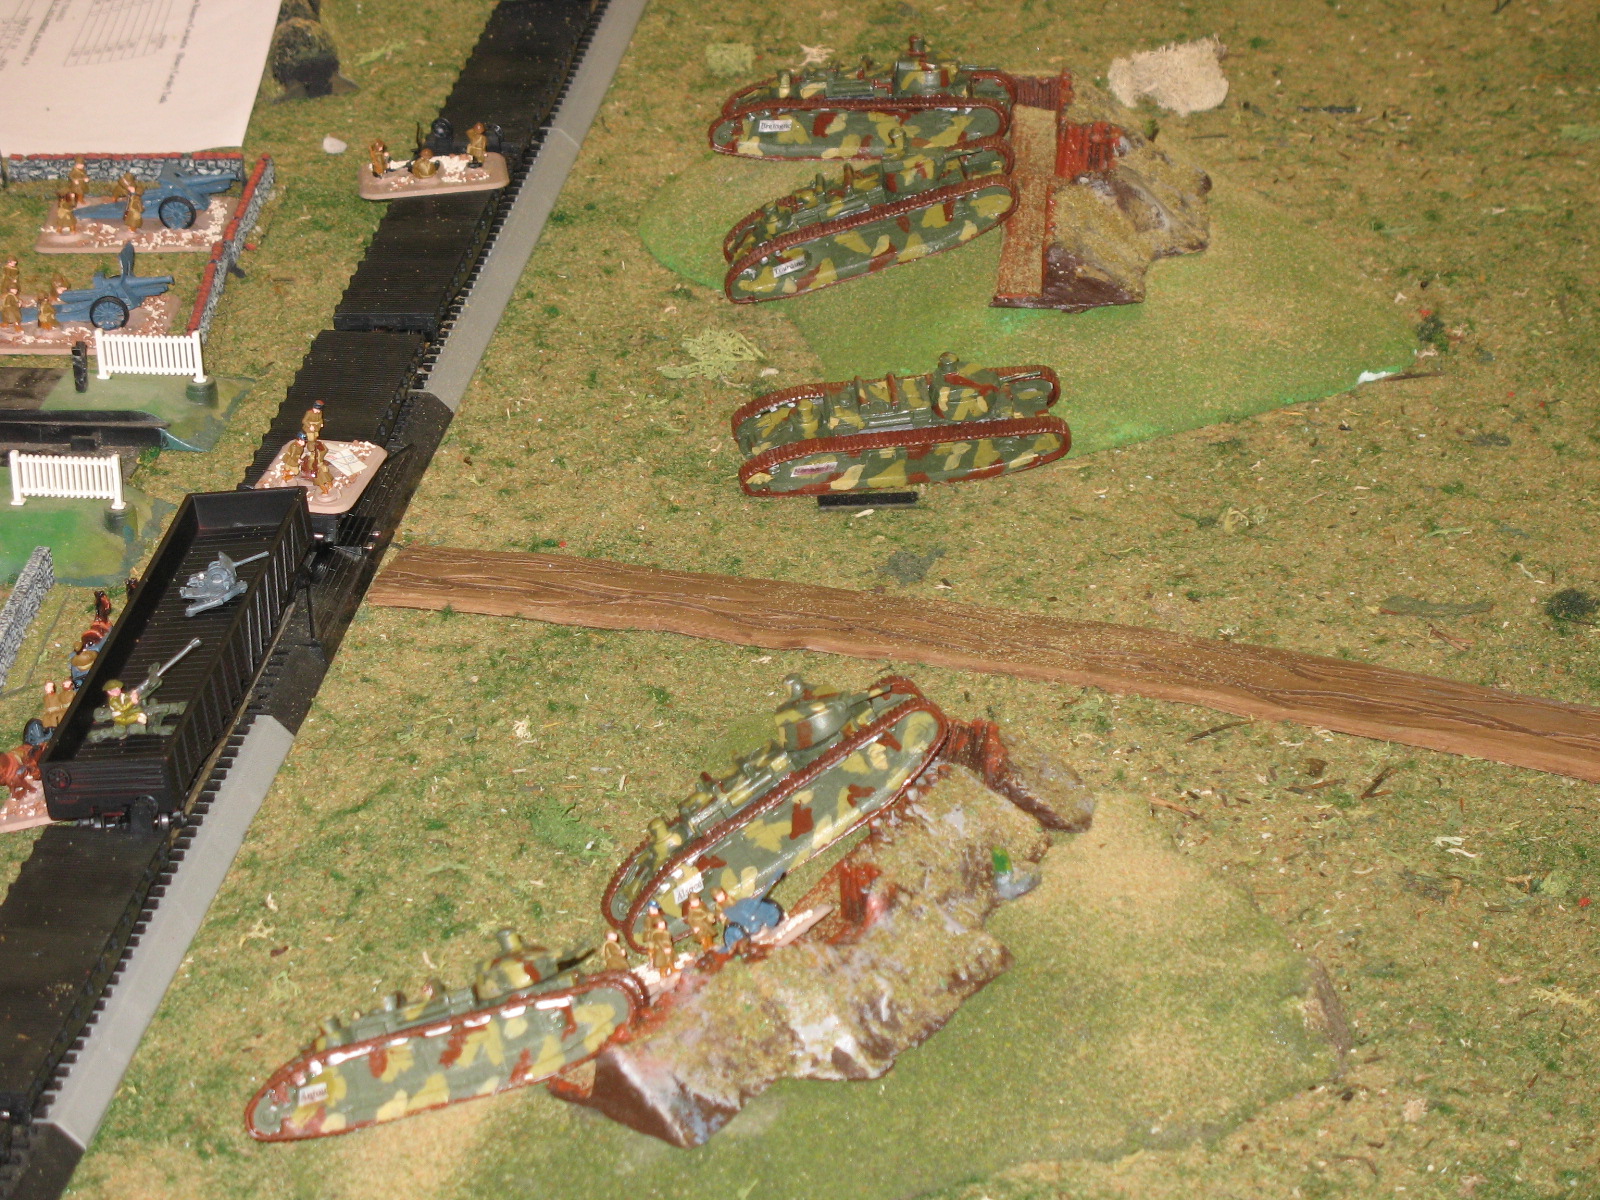
LE DERNIERE CHEVAUCHER
Several of you were at Phil’s the day we did this. LOOOONG front 10’ or more, of hills, woods, a medieval
tower, hedges, with trenches/gun positions (all around defense – hey, these are French, and they KNOW how to
dig in!) on the high ground and in the gaps.
Of course, there were only 1500 points of French to hold this – and they were infantry, but with every gun I could legitimately buy them. I gave the French the option of recombining forces into ad hoc platoons --- ie they had two platoons of riflemen, one of HMG, one of 47mm AT (four guns) three of 25mm AT (2 guns each) and one of 75mm (4 guns) that they could recombine and spread out…these eight platoons became eight unique mixed-arms forces, each with its own defensive position and officer.
In rear support were three more platoons – 105s, mortars and AA guns.
To their rear was a rail depot, with a pair of 47mm at guns dug in around battalion HQ. there was also a reinforcing’ battery off board (ie if the French battery of 105s bombards, on a 4-6 the reinforcing battery joins in – either as a double wide template or reroll misses, French choice…most times they went for the big template, when the guns were available)
A train carrying the 5 Landfortresses (Char 2C) was on board and slowing down by half each turn (took until turn 5 to begin unloading) and two companies were to roll in as reinforcements (one of light and one of heavy armor – the former including recon vehicles and dragoons, the later the big Char B and Somuas)
Total, just over 5000 points.
Opposing them, 5300 points of Germans, with priority air. The germans had three companies – one each panzer, panzer grenadier and panzer recon…with battalion HQ and Battalion 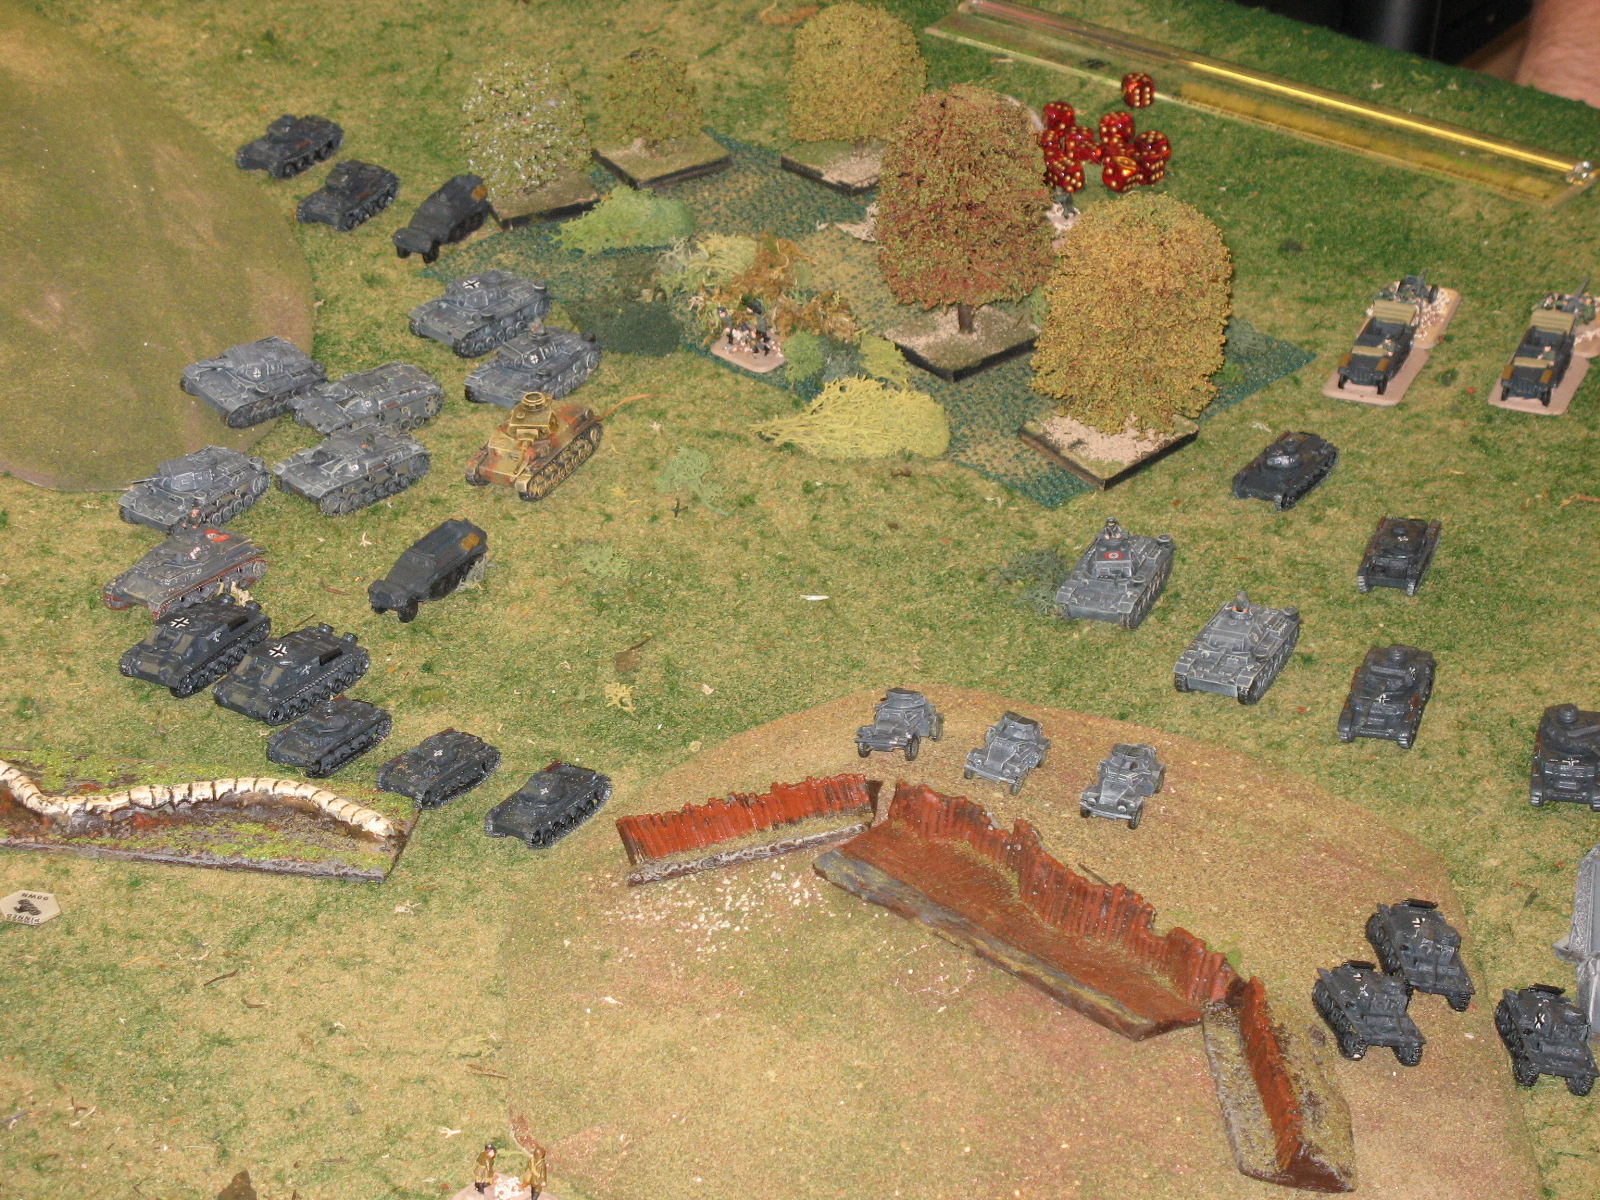 support (including pioneers). They had to come in two platoons turn one, two more turn 2, the rest on turn 3. each company had to come in on its own 2 foot front…and no overlap. This representing a broad sweep…but still giving them the chance to concentrate on the left, right or middle of the 10’+ table. Each company had its own recon and gun assets as well.
The Germans (Andy in Command, with John and later James) came on cautiously, and spent 6 of the 8 ½ turns of the game pounding away at the French front line that Phil and Chris had so expertly arranged.
The Germans pushed through the center, which they had cleared of troops, just in time to engage the landfortresses as they were moving off the trains, and the French heavy armor as it came on the board (late as usual)
A good solid tank battle ensued, with the germans using their storm trooper moves to fire and retire, making it hard for the French to engage (as the French tanks either move or shoot – the exception being the large land fortresses, which can do both, although they move slowly)
The French ad hoc platoon on the left held off german at guns on the hill, while andy’s move on the other flank ran into the French light forces --- which came out, fired a few shots then retired behind the rail embankment.
The Luftwaffe showed up consistently …and missed consistently. At least three times they had the French armor in their template, and got through the AA … then whiffed.
 We called the game at 715 – mainly because the Germans had announced that they were just going to engage in a long dance and duel rather than go in to take the depot, and for the French to get the land fortresses off the board (their automatic victory conditions) would have taken at least another five turns (physical movement)…that would have meant a lot of long range gun duels with tanks, none of whom possessed any real superiority in fp vs armor (ie basically if you rolled anything but a 1 or 2 on an armor save you were safe at that range)
Also, by phil pulling BACK his light French troops on defense, and andy advancing only cautiously on them, there was not going to be any big fight there…
The game was called on points…Germans lost three platoons, French 5. no companies broke. Basically a draw. Germans won only because I screwed up and SHOULD have MADE the taking of the depot the victory condition….FOW wisely sets objectives and time limits, and I had blipped on that.
Next time we play (and we will, as ed wants to host it at his place) the germans will have a time or turn limit by which they MUST take the depot or retire….after all, this was a real battle in june 1940, a few days before the armistice.
The germans went home with a technical win, but the French felt like winners too --- not just because they
held the depot, but because they did so much better than any French force in that campaign!
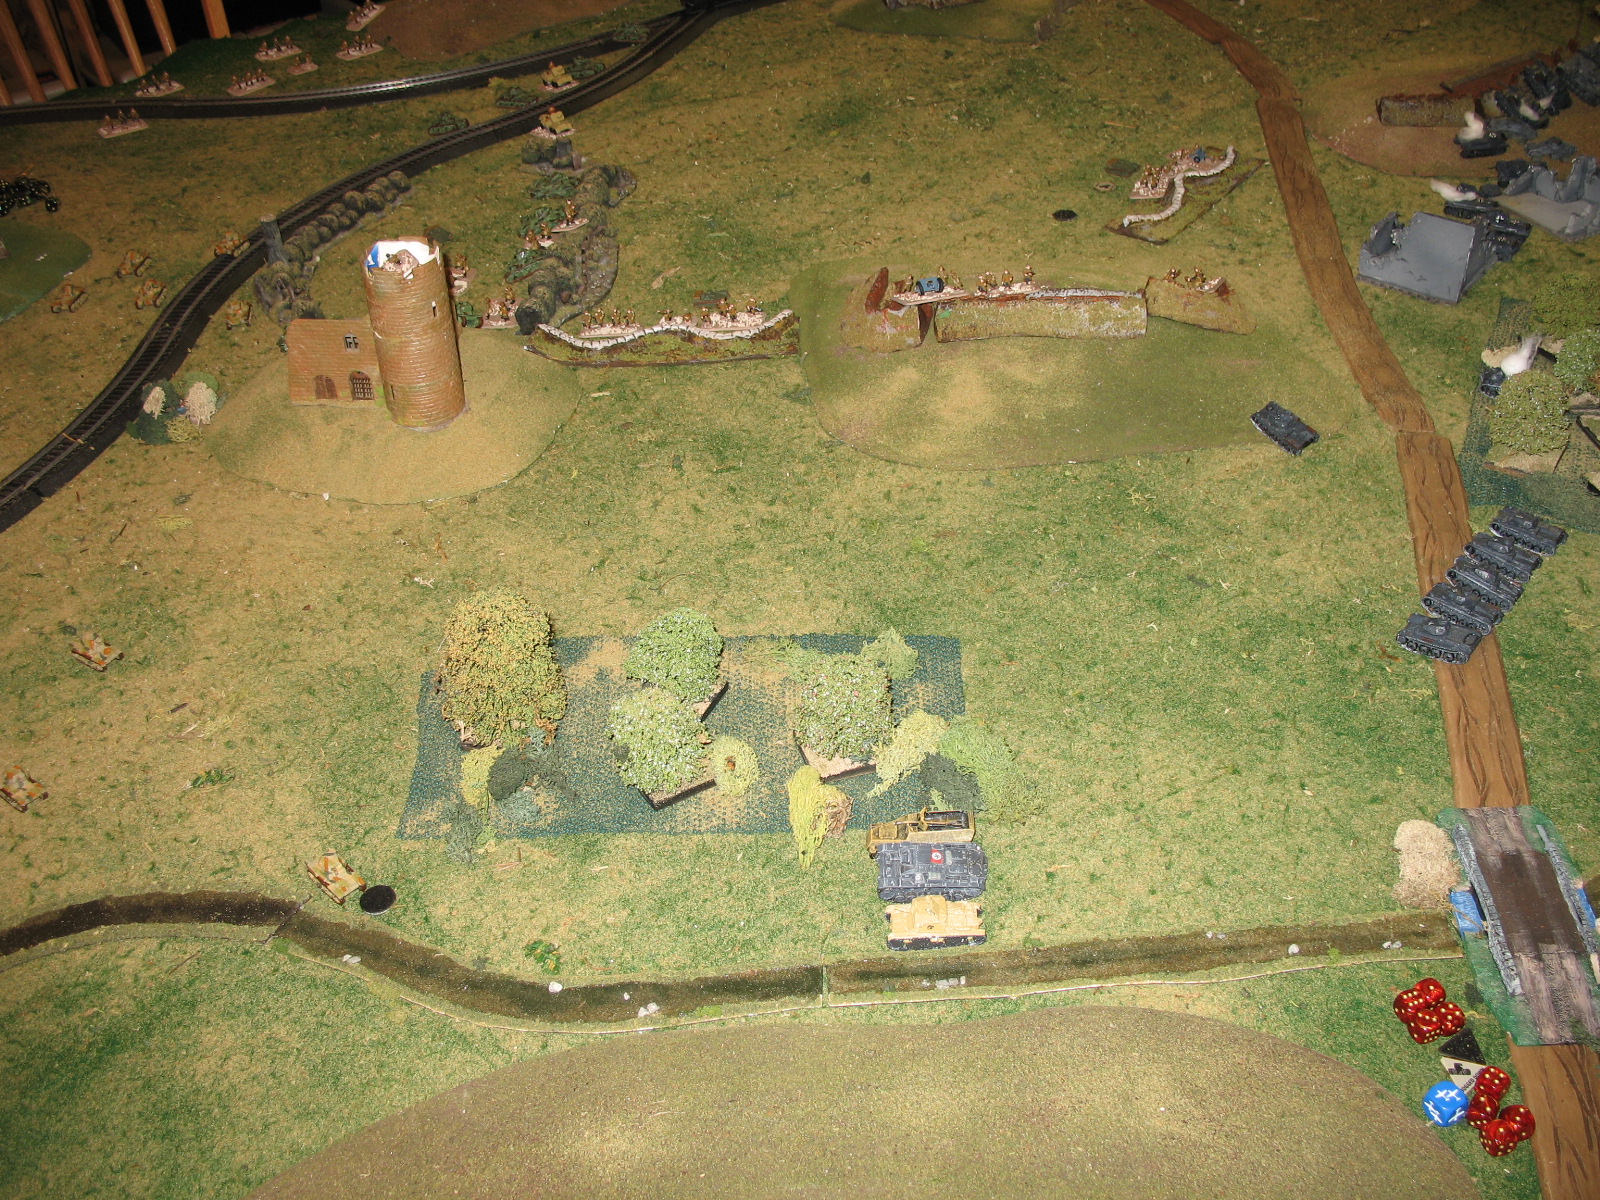 One key point in the game was a medieval tower, where the French put a lot of observers….the germans never took it out, and only late in the game did they really bring fire on it. Andy was advancing on it and shooting at it with his light tanks at the end game, but the tower was right in front of the French light company. It felt right, too, as the tower, like so many in france, was high and above it all, and the perfect observation point!
Everyone played well, and quickly – we began rolling dice around 130, stopped for a nice lunch, then played until 715 – and this was only the second game ever for james, phil, chris and john, and andy’s first…
(I moderated, I did not play)
RUSSIANS AT THE WIRE
Monday night at the club, Matt and Chris took German FJ and Pz Gren dug in with trenches, minefields and tank traps against Dave and Phil with their Russian tank and motorized rifle companies. 3000 points a side, 1500 per company. Half the germans off the table, rolling to come in on turn 4 and on (one die turn 4, two on turn 5)
The Russian pre-game bombardment (as per the scenario) did not do a lot. The Germans did not hold their front
line, but, a la Heinrici (the commander on the ‘eastern’ front in 1945) were all in the second and third line. The Russian tanks broke through were the tank traps were not --- but into the 88s and other at guns, with predictable and sad results. The Russian infantry made little progress coming thru the minefields as they ran into an open ground killing field set up by the FJ in trenches in the woods.
Of course, the Russians did not have much in the way of arty, and no airpower, and none were guards…
Next time, things will be different.
(PS: as matt already wrote up a good report on this one, I just put in the short version)
PANZERS AND RENAULTS
While the Russian front battle was going on, I set up a meeting engagement in france 1940 for Joe, who came over from Albany and who does not play FOW. He had the panzers. I took the French, but turned them over to Steve, who had also come over from Albany.
1500 points of French dragoons (motorized infantry, light tanks) vs German Recon (armored cars, light tanks, motorized infantry) and with both sides having light guns (the germans had trucks to tow theirs, the French had horse teams)
a good meeting engagement, with French recon tankettes roaring into the village and breaking into the houses, and the germans trying to winkle them out, while other French recon swung wide, over ran some at guns in the woods. A central tank battle also took place. The Germans were winning on kills, but the French held the town…and thus the French got a win on that one….a good learning game
WHIP THE GUN TEAMS
As Chris had now played three FOW games and all had trenches, he wanted to play one without trenches. I set up a good meeting engagement between French and Italians in North Africa in 1942.
We came on at opposite corners of the table (3.5 x 8’ table) and fought across the narrow part …. We each grabbed one objective easily, and the bridge over the wadi in the middle became the critical objective.
The Italians had 1500 points of motorized (bersagliere with armor) vs the French who had 1500 points of a mixed force of leg infantry, horsedrawn guns (love those horses and limbers, and for the big guns you need TWO bases – one of limbers and one of extra horses) and armor.
The French did manage to break into the village the bersaglieri had taken, but were kicked out. Italian tanks and French tanks had a grand duel, with each feeding in more tanks and more at guns (and the Italian air force making a few straffing runs). The Italian air force scored a real coup on the columns of horsedrawn guns, which were also pounded heavily by the Italians 100 mm guns. Much of the French never got off a shot, as they died before or just after deploying…French armor did give a good account of itself, as did the French heavy guns.
French, however, did lose, as the game ended when, at the end of the 7th turn, the Italians held two of the three objectives….
WAKE ISLAND
Chris and I did not just do FOW. We did many short board games, including Memoir 44. We did some Russian front battles from the Russian front expansion pack, and did wake island from the Japanese expansion kit. The marine and Japanese rules are good, simple and add a nice flavor. The first time we did wake, the japs just walked all over my marines. The second time, though, the japs got crushed --- and I know, because I was the japs, and it felt like the movie with me being up against Robert preston, brian donlevy, William bendix and all those other Hollywood war heroes.
Good expansion pack. If you don’t have it, and like memoir, get it. The toys are especially nice (little jap tanks and guns, nice infantry)
A LITTLE BATTLE IN VIRGINIA
Chris and I did not play all ww2. we did Command and Colors Ancients (but with painted lead rather than wooden blocs. We played the new scenarios that gmt gave out at the wbc convention…carthage vs mercenaries)
We also played some settlers (two-player board game) and a crusades game (deus lo volt – simple pawn game of the siege of Jerusalem, short)
And Ed graciously hosted a grand civil war game --- lots and lots of 25mm soldiers in a great fire and fury fest.
Chris took the rebs on a defensive line, with some hills, woods and stone walls and a barn while ed and I took the Yankees on the attack. Our artillery kept siliencing the reb batteries, and the rebel charge, which looked like it would win as Chris launched it when our front line was all disrupted, floundered….we played on until chris said that at that point in the game the rebels would have disengaged and fallen back… and, being Yankees, and being so glad to have just HELD the field at the end of the day, we, of course, would never think of pursuing….
Chris and I also played Civ IV hot seat, and I got the new Civ IV warlord game … we looked at the booklet longingly, and it looks good, but were wary of loading it as it would probably have wiped out the save game files for the game we had played a few hours of each night he was here.
It was like being at another convention – but a kinder, gentler one than either Historicon (late july) or WBC (the board game con I went to in early august)
BACK TO TOP
Alexander the Great, Overdone
I have been in an Alexander the Great tizzy. First, finished the Thrones and Patriots scenario (really liked it when in India my army deserted and just said it was going home, right in the middle of the battle..but i won anyway)
Second, have become an alpha tester for a wonderful turn-based alex the great computer game. It uses painted lead soldiers as the units. You use the mouse to point and clik to give orders, then the computer moves both sides simultaneously -- you see the stands of troops crossing the board (which is also made of real wargame terrain) as if being pushed. When they fight, a rotating sword marks the units engaged, then a hand of god comes down and removes dead figures.
So far they have Thebes, Granicus and Issus in the alpha version, and are making upgrades on the units, their look and the morale system, largely based on my input. It is a lot of fun. You do alex's battles in the historical order. You have to win to advance. Like Panzer General, tho, units promote, lost units can be rebuilt but at lower morale etc.
Here is the website:
http://koiosworks.com/
--I have watched my "In the Footsteps of Alexander the Great" video (pbs, Michael Wood), read my Plutarch's
"Life of Alexander," purchased Arrian and Curtius' histories (both are romans, but they had access to original documents long since destroyed, like the memoirs of Ptolemy, etc)...and a couple of Alexander novels...plus gone thru my history/wargame texts.
Coming right after Troy and all those Troy tv specials, I'm in a hoplite kind of mind....
But, just to show you that I have other interests as well, I got the new Axis and Allies, the new Axis and Allies D-Day and the new Trilogy edition of Lord of the Rings Risk.
So, if anyone is up for a board game....
D-Day Axis and Allies
(New Axis and Allies adds in the units from Axis and Allies Europe and Pacific -- ie destroyers, artillery -- and some of those rules, plus has a new map -- with many areas you can't go, like the Himalyas, deep Sahara etc -- and a lot of the old optional rules (like kamikazes, russian winter etc)
The D-day one is Axis and Allies pieces and just the Normandy invasion...allies have 10 turns to take three big cities. Neat rules and cards, and it looks like it will play well (you have reinforcements that you roll for to arrive, instead of buying units)
Lord of the Rings Risk Trilogy
Lord of the Rings Risk adds the lower board and some more toys and cards to the earlier version. Unfortunately it does not have the real kicker bonus i saw in the UK...that expansion set came with a Battle of Gondor stand alone board game...sort of like the battle cry miniatures on a board game we all play.
Finally, Wellington is coming along. Mark Simonitch has the map done and is sending me a copy next week (I can see it on line so far, but i need to see it up close). should be out before the end of the year.
And double finally, Campbell graduates from 8th grade Sunday...can you believe how old he is getting? He is painting up lots of sci-fi soldiers, including the latest batch his godfather sent up from Virginia...for which he is mightily grateful
BACK TO TOP
Napoleonic Wars
After Action Report, April 2004
Had fun at ct game club yesterday. ran nappy; one new guy (George Schneider), one who had played only once, crazy mike you can never remember how to play, and Eric, all vs John Demeter, who won mostly by accident. (he invaded England, got stranded there, but despite three major battles against bigger British armies, the emperor and one man survived, took London, flagged York, Edinburgh and Wales and conquered England on a die roll...much to his surprise...as once nappy got trapped he kept trying to get the emperor killed so he could rebuild him to face the Austrians and Russians, who were pressing him hard.
He fell short of an automatic victory on turn 1 by 2 points (he had 4 vp plus England conquered), and whiffed the peace roll by one (of course, had he burned a card...). second turn he was doing great guns, his Spanish cutting deep into Zagreb and Dalmatia while Davout was advancing on Prague and nappy toward Vienna, and his Turks were in southern Russia....then it all fell apart. they broke the Spanish alliance...he bought it back. they broke the Turkish alliance, he decided not to buy it back, then on the last Austrian card play, with the French having only one card left, they broke the Spanish alliance again, when he could not buy it back....
Had Spain stayed French, it would have been a French automatic,,,but again, it was 4 vp and a botched die roll off by one (Prussia paid to keep the war going).
Turn 3 was going to be bad for the frogs, with Russia, Austria, now Prussia (fully mobilized and in control of both Sweden and Denmark) and a restored England with a full wellington army group at the ports...john agreed turn 3 would be a bad one for the french, so he conceded...and the other allies figured that the Prussians would win, as they had 2 vp (Austria and Russia had none, England was still negative) and Prussia had the biggest army.....
It might not have gone that way, but the french player's morale had effectively broken, knowing he had shot his wad...twice..and was not going to get a third chance at it.
We did a nice little air battle game (luftwaffe vs bombers in miniatures) with Andy, and a good, short, quick and close rev war in 25mm.
Two guys came and set up day-long demos of a fantasy axis and allies type game with nice miniatures, a couple of board games were going on (the Settlers of Catan in space being the longest) and a Warhammer and WW2 east front miniatures game were played, too)
a good day at the club....
BACK TO TOP
McLaughlin axioms, corollaries
and theories on Military Strategy
--As long as you have at least two fifers and a drummer boy, ATTACK!
--And the McLaughlin theory of military relativity:
---A minute on defense fells like an hour; an hour on offense feels like a minute.
--And the McLaughlin code of wargaming:
---If we do nothing but sit and hold and roll some dice what does it matter if we win? Take up the challenge, push the lead and be bold until we feel the heart pound to the beat of the drums...after all, these soldiers can come back out of the box next
week...
BACK TO TOP
McLaughlin's Last Charge
--or Never Dice With Kids
In my endless quest to find a way to defeat the Mage Knight black powder rebel army that Campbell has built, i decided to stop trying to create sensible, historical armies of knights, longbows and pikemen, each combination of which has met the kind of disaster one should probably expect when faced with guys with muskets, flamethrowers, grenades and walking steam-powered tanks.
As Campbell has just finished reading Lord of the Rings, I decided I would scrape together all of the Orc figures that came with the many Mage Knight sets we bought. Campbell built his typical 300-point army (most of which was given to him as a present by his chief armorer, his godfather Chris, may his name be inscribed on the list of the damned forever), and his pal Ben, also 11, built his Atlantean army (kind of a jules vernish collection of heavily armored foot knights with chainsaws and giant scissors, backed by guys with lightning wands riding on giant spiders).
to meet their combined 600 points I chose 600 points of orcs. Orcs are lots of big lumpy guys with clubs. I had a total of one decent archer and one very short range crossbowman, two grenadiers, and a two thugs with crossbows riding spiked rhinos -- everybody else
was a big lumpy thug with a club (except for my personal favorite, the Orc Bagpiper: the bagpiper inspires everyone in his unit to move faster, probably to get away from the sound of the pipes)
Unfortunately, and rather stupidly, i let the boys select the terrain.
Campbell got the hill.
If there is anything more hopeless than taking guys with clubs against guys with guns, it is having to do so uphill. The result was a predictable if glorious recreation of Pickett's Charge, with me being Pickett. At first it looked more like Marye's Heights, but, like Pickett, my boys actually did get up the hill and into the enemy line. I even got to charge cavalry through a breach in the line made by some of the infantry (who, when they died, left my mounted guys an opening into campbell's second line).
It looked good for a moment there. Then it all fell apart. Little Ben moved on my left and slaughtered the corps of orc infantry and archers i had set to hold him off -- my last two guys, the mounted crossbows on rhinos, ran to a hillock to make their last stand. In the meantime, the orcs that were fighting on the hill with campbell succumbed, as cam's pistoleers whipped around the flanks, took out the grenadiers (my only firepower there) from behind, and crushed the last hope of the orcs.
In retrospect, my elvish knight army looked really good in comparison. At least when it lost, it lost with style.
Orcs suck.
Back to the drawing board.
BACK TO TOP
Crockett Surrendered:
The Real Story Behind the Alamo
I am reading the diary of Jose de la Pena, an officer on Santa Anna's staff who was with him in Texas in '36 -- he wrote a scathing attack on Santa Anna. Things I did not know (and this is the newly updated version with the "lost week" found in packets in a remote library a couple of years ago):
1. The mexican army had to march through knee-deep snow to reach texas in feb 36
2. There was such a shortage of wagons and boxes that they put their food and powder into gunny sacks and strapped them onto the mules and donkeys. The sacks got wet from rain and snow and most of their food and powder was ruined.
3. Of the "13 days of Glory" at the alamo not much happened for the middle 10, except some desultory and innefective artilly fire -- texans had 19 guns of various size, about twice what the mexicans had (their heaviest was a pair of 12 pounders -- the rest of the artillery was delayed). Finally, rather than wait another two days for his big guns, santa anna ordered an attack.
Men got up at 1 am and were in position before dawn. The diarist says the attack was bungled -- men all bunched up, no coordination, not enough ladders -- and those were poorly made -- and no breach from artillery to go through.
He says the Mexicans were cut down as they went forward, but kept on going. They broke into the alamo and many of the texans started to put white flags on their guns -- socks, handkerchiefs, bits of cloth -- but a number of the yankee "pirates" as he calls the americans (as opposed to the texan colonists) kept firing -- so the mex troops went crazy.
Despite the slaughter, 8 yanks surrendered -- one of them was Crockett. Despite the intervention of a general, Santa Anna ordered all 8 executed. Just as he would a week later with Fannon and the rest of the Goliad gang that had surrendered. (Great story of that fight in this book -- seems it was a running battle in which fannon finally formed a wagon box, and refused to leave his wounded -- about a third of his command -- so he surrendered unconditionally to General Urrea who had boxed him in with inferior numbers).
De la Pena says the army was demoralized not only by the execution of the prisoners (they all felt ashamed) but by their own losses at the alamo. He says they only lost 70 men outright, but another 250 died of wounds over the
next two weeks -- there were no doctors or medicines with the mex army!
From here on, the situation only gets worse...
Bascially, Jose de la Pena says Santa Anna lost in Texas from not merely a lack of proper prior planning, but an ignorance and neglect of the basic needs of the common soldier to live, let alone fight. and then, he adds, Santa Anna did not know how to use his men to their best -- he just threw them away.
This sort of writing, published first in 1838 in Mexican newspapers, got Jose de la Pena jailed. He died of illnesses contracted during his stay in prison in the early 1840s. Fascinating book....unbelieveably fascinating.
Parting Shots Dept.,
"Victory at all costs, victory in spite of all terror,
victory however long and hard the road may be;
for without victory there is no survival."
Winston Churchill
BACK TO TOP